Image Credit: IzziBGran / GamifiedLife, LLC
After a Spark of Imagination
The search for the Spark of Imagination continues as you explore the lower levels of the Ancient Ruins on Disney Dreamlight Valley’s Eternity Isle. As you look around, a movement catches your eye. What was that and where did it go?
Complete:
Merlin Quest: A Bit of Help From Your Friends
Resources you will use during this quest.
- none
Ingredients you will use during this quest.
- none
The Quest Continues
You have finally reached the lower levels of the Ancient Ruins! Now all you need to do is find the Spark of Imagination.
Looking around, you see a strange rabbit dart around the corner. Now that’s interesting! Might as well follow it and see where it went.

Image Credit: SelinaB / GamifiedLife, LLC
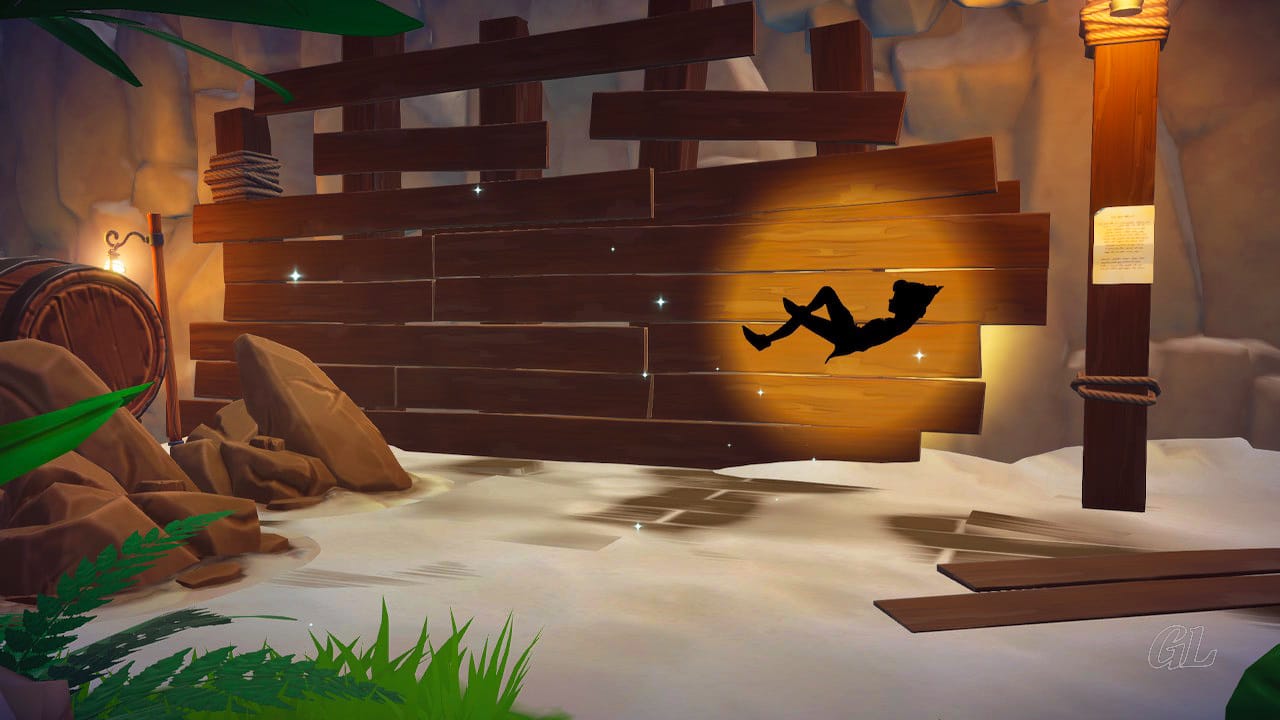
Meet Oswald!
The corridor in front of you leads into a rather large room. Off in the distance is a strange light at the top of a steep staircase. Could that be the Spark of Imagination?
Of course, it can’t be as simple as just walking over to it. There is a complicated platform mechanism in the middle of the room that appears to turn, but there is no way to reach it from where you stand.
Still, before you can contemplate your next move, there is the strange rabbit to consider. He is waiting for you just inside the room. It’s Oswald!
Quest Task: Talk to the peculiar rabbit.

Image Credit: IzziBGran / GamifiedLife, LLC
Find a Bridge Lever Handle
Oswald has been in the Ancient Ruins for some time. He seems to know a bit about this room. There is a lever off to one side with a missing handle. It appears that the lever will raise a walkway and create a bridge to the central platform. Could the handle be in the nearby debris?
A search of the area does not come up with the bridge lever, but you do find a horn on a pedestal.
Give the horn a try. It startles Oswald, who jumps into the air. In true cartoon fashion, an exclamation mark “!” pops out of the top of his head!
A Ha! This will make a very nice handle!!
Quest Task: Search for something to repair the bridge lever.
Quest Task: Fix the lever to reach the next platform.

Image Credit: SelinaB / GamifiedLife, LLC
Repairing the Bridge Lever
Pick up the “!” and interact with the bridge lever to repair it.
Pull the newly affixed handle down and a bridge raises to connect your current position to the Central Platform.
This is progress.

Image Credit: SelinaB / GamifiedLife, LLC
Reaching the Central Platform
As soon as the bridge meets the platform, Oswald races across.
Follow that rabbit!
Quest Task: Follow Oswald.

Image Credit: IzziBGran / GamifiedLife, LLC
The Central Platform
Reaching the Central Platform, you see a Second Platform that you need to reach before you can get to the stairs leading to the Spark of Imagination.
There is a walkway attached to the Central Platform. It is currently creating a bridge to a small area off to the east side of the room. If you can get the Central Platform to rotate, this walkway should be able to connect to the Second Platform so you can continue on to the Spark of Imagination.
However, as with the bridge lever, the handle to the Central Platform’s turning mechanism is missing.
Explain your predicament to Oswald.
He looks very confused and a question mark “?” pops out of his head. Now this is interesting. The “?” alone doesn’t seem to be enough to fix the turning mechanism, but it may still come in useful.
What you need now are some gears and it appears that Oswald also sent some of these flying in his confusion.
Quest Task: The bridge should rotate… Come up with a solution using everything you can find.

Image Credit: IzziBGran / GamifiedLife, LLC
Create a Question Mark Wheel
Collect all the gears that are flying around the room. You may have to backtrack to the entrance of the room to get them all.
When you have 3 gears in your Inventory, head across the walkway stretching from the Central Platform to the east side of the room.
There is a Timebending Table standing in an alcove on the east side of the large room. This is a welcome sight. With Oswald’s “?” and flying gears, you can easily craft a Question Mark Wheel. This should work perfectly as the handle for the mechanism that turns the Central Platform.

Image Credit: SelinaB / GamifiedLife, LLC
Turn the Central Platform
Place the Question Mark Wheel in the turning mechanism in the center of the Central Platform. Interacting with it will cause the platform to rotate.
Continue the rotation until the walkway creates a bridge to the next platform. As soon as it does, Oswald once again races ahead!
Quest Task: Activate the wheel to turn the bridge.
Quest Task: Follow Oswald to the next platform.
Pro Tip: Before leaving the area completely, turn the central platform until the walkway meets a small area on the west side of the room. A treasure chest is nestled there behind some rocks, that are easily removed with your pickaxe.

Image Credit: SelinaB / GamifiedLife, LLC
The Second Platform
Follow Oswald across the walkway and up the short flight of stairs. You’re getting very close to the Spark of Imagination. Even Oswald is getting excited.
There is still work to be done, however. The mechanisms controlling the second platform are also broken. Still, this time you have a pretty good idea of what it will take to fix it.

Image Credit: SelinaB / GamifiedLife, LLC
A Little More Complicated
The Second Platform repairs are a little more complicated than the first one.
Not only do you have to rotate the platform, but there is also a walkway that needs to be raised with pillars at its’ entrance, blocking the way forward. Since both are broken, it becomes immediately obvious that you need to find two things before you can move forward; a lever to raise the bridge and a handle to rotate the platform.
Talk to Oswald once again. Another “?” pops out of his head. He also sends some more gears flying about. It’s a good start. Best get to work.
Quest Task: Talk to Oswald.
Quest Task: Use everything you’ve learned to fix the platform and reach the Spark of Imagination.

Image Credit: SelinaB / GamifiedLife, LLC
Crafting Another Wheel
Retrace your steps to the central platform and rotate it a few times until you can reach all the flying gears and make your way back to the Timebending Table.
Repeat the process of crafting a Question Mark Wheel.
With the new Question Mark Wheel in your Inventory, head back to the Central Platform. Turn the Central Platform once again so the walkway aligns with the Second Platform and cross over.
Place your new Question Mark Wheel in the Second Platform’s Turning Mechanism. You’re in business!

Image Credit: IzziBGran / GamifiedLife, LLC
Another Bridge Lever
You now have a way to rotate the Second Platform. But before you can reach the Spark of Imagination, you will need to fix the bridge lever. The lever will cause the pillars in front of the walkway to lower and the walkway itself to slope upwards, so you can reach the stairs to the Spark.
You need a handle for the lever. There is an area on the west side of the room, perhaps there is something there that will work.
Rotate the second platform until the walkway extends to the small area on the west side of the room. When the walkway lines up with the new area, the three pillars blocking the entrance to the walkway lower. This is a good sign.
Cross over to the new area. There is a horn among some debris. Perfect, that’s just what you need to get a handle for the bridge lever.
Return to the Second Platform and place the horn on the pedestal. Once again give it a try and watch Oswald jump.
Grab the “!” that pops out of the top of Oswald’s head and use it as a handle for the bridge lever.
Turn the Second Platform so that the walkway aligns with the stairs leading to the Spark and then pull the bridge lever down. The Pillars blocking the walkway drop and the path to the Spark stands open before you!

Image Credit: SelinaB / GamifiedLife, LLC

Image Credit: SelinaB / GamifiedLife, LLC
The Pillars Lower – The Walkway raises

Image Credit: SelinaB / GamifiedLife, LLC
The Spark of Imagination
Finally, you can now reach the Spark of Imagination!!
Head up the staircase and pick up your prize!
Quest Task: Pick up the Spark of Imagination.

Image Credit: IzziBGran / GamifiedLife, LLC
Merlin’s Surprise Appearance
Just as you take possession of The Spark of Imagination, Merlin appears.
Your conversation with Merlin is very suspicious, but before you can do anything, he takes the Spark of Imagination from you and turns into… Jafar.
An evil grin crosses Jafar’s face, and he disappears, taking the Spark with him.
Quest Task: Talk to Merlin.

Image Credit: IzziBGran / GamifiedLife, LLC
Defeat
There is nothing left to do but head back to Oswald and leave the Ancient Ruins.
You need to consult with Merlin… the REAL Merlin!
Quest Task: Return To Oswald.

Image Credit: IzziBGran / GamifiedLife, LLC
The Adventure Continues


Your Eternity Isle adventures continue in The Monochrome Mystery.
In This Article
Disney Dreamlight Valley Guides
- Storybook Vale Critters Guide
- Navigating Storybook Vale
- Goofy's Storybook Vale Stalls
- All Storybook Vale Recipes
- All Blocked Chests in SV Trials
- Wild Woods Fairy Tale Trial
- Teapot Falls Fairy Tale Trial
- Fallen Fortress Fairy Tale Trial
- Elysian Fields Mythic Trial
- Fiery Plains Mythic Trial
- Statue's Shadow Mythic Trial
- Maleficent's Castle
- Mount Olympus
-
- Ariel
- Beast
- Belle
- Daisy
- Donald
- EVE
- Fairy Godmother
- Gaston
- Goofy
- Jack Skellington
- Jafar
- Kristoff
- Maui
- Merlin
- Mickey Mouse
- Mike Wazowski
- Minnie Mouse
- Mirabel
- Moana
- Mother Gothel
- Mulan
- Mushu
- Olaf
- Oswald
- Prince Eric
- Pumbaa
- Rapunzel
- Remy
- Scar
- Scrooge McDuck
- Simba
- Stitch
- Sulley
- The Forgotten
- Tiana
- Timon
- Ursula & Vanessa
- Vanellope
- WALL-E
About the Author: IzziBGran
Get the latest news & updates