Image Credit: IzziBGran / GamifiedLife, LLC
Carpet Diem
The vortex that captured the Magic Carpet is gone! The Magic Carpet is excitedly flying near the ground waiting to take Aladdin on a fun ride. However, the Windcaller still needs to be brought to the ground. Join us in Carpet Diem as we complete this final task so that Aladdin and Jasmine can return to Dreamlight Valley!
Complete:
Jasmine Quest: Wish Magic
Location:
Dreamlight Valley
Resources you will use during this quest.
- none
Ingredients you will use during this quest.
- none
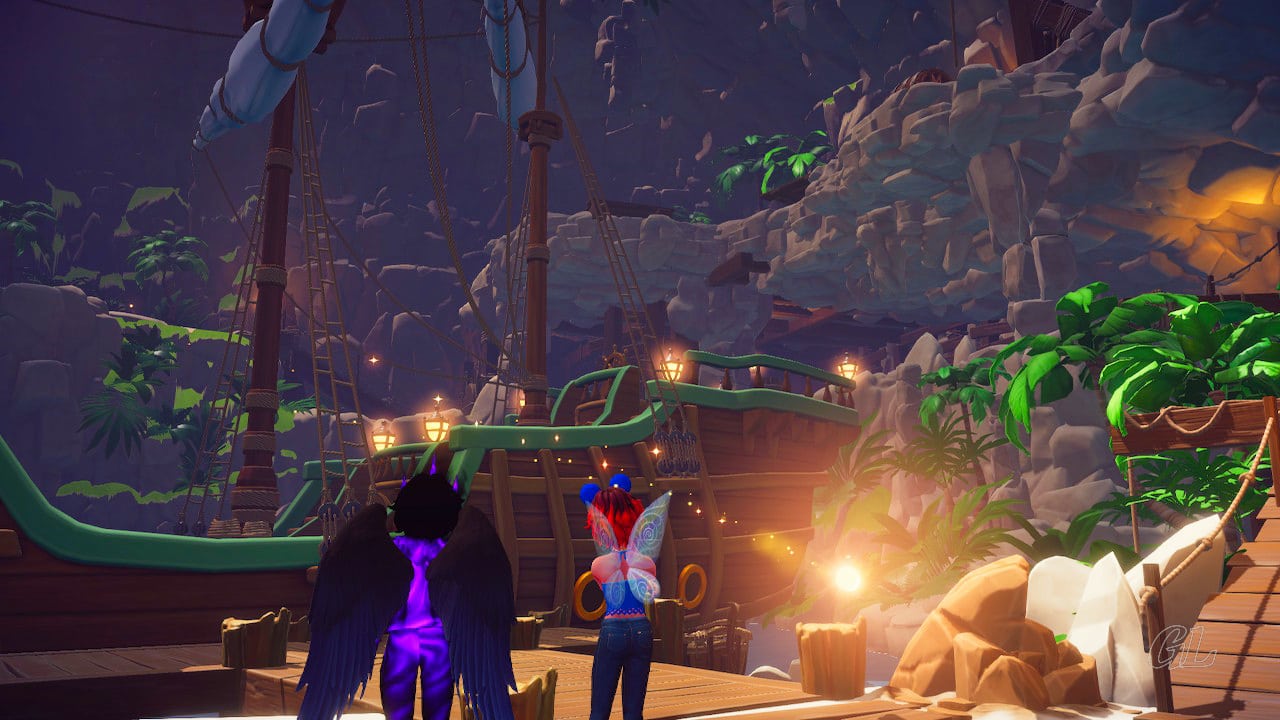
Fly to the Windcaller
The large Sand Cyclone surrounding the Windcaller is gone, but the Windcaller is still floating high above the Central Market. You need to reach the top if you are going to stop it from regaining any power.
Lucky for you, Aladdin and the Magic Carpet are here to help. Hop on board. It’s time to take your first Magic Carpet ride!
Carpet Diem Quest Task: Interact with the Magic Carpet to fly up toward the Windcaller.
Carpet Diem Quest Task: Return to the Windcaller using the Magic Carpet.

Image Credit: IzziBGran / GamifiedLife, LLC
Break the Crystals
When you reach the top of the Windcaller, you can see 4 colored crystals adorning its’ sides. They may be pretty, but they are also the source of the Windcaller’s remaining magic. You need to break each one, if you want to neutralize it.
Small islands are floating around the Windcaller. It looks like you can use them to reach all of the crystals. So, the Magic Carpet sets you down on one of the islands. This one is near the red crystal.
Carpet Diem Quest Task: Use your Royal Pickaxe to destroy each of the Windcaller’s Crystals.
- Red Crystal
- Yellow Crystal
- Blue Crystal
- Green Crystal

Image Credit: IzziBGran / GamifiedLife, LLC
The Red Crystal
Cross the plank, which is already in place, to reach the red crystal.
Use your Royal Pickaxe to break it and return across the plank bridge to Aladdin and the Magic Carpet.

Image Credit: IzziBGran / GamifiedLife, LLC
Circle the Windcaller
There is a medium plank leaning against some boxes close to where Aladdin and the Magic Carpet are standing. Grab the plank. You can use it to make a bridge to the next floating island. But first you need to remove the Sandstone deposits that are blocking the way.
Set the plank down and cross to the next floating island where you’ll find another plank surrounded by Sandstone deposits.
Remove the Sandstone deposits to reach the plank and use it to create a bridge to the floating island to its’ left.

Image Credit: IzziBGran / GamifiedLife, LLC
Yellow Crystal
You are now really close to the Yellow Crystal.
Directly in front of you is a small quicksand pool, blocking the passage forward. However, there is enough room to go left around the quicksand and reach the plank that leads to the Yellow Crystal.
Break the Yellow Crystal with your Royal Pickaxe and return to the quicksand pool.
Quicksand Pool

Image Credit: IzziBGran / GamifiedLife, LLC
Path to the Left

Image Credit: IzziBGran / GamifiedLife, LLC
Quicksand Pool
A Fishing Circle is in the middle of the quicksand pool. Pull out your Royal Fishing Rod and snag the plank bridge just below the quicksand surface. You now have a way forward.
Use your pickaxe on the unstable scaffolding, on the other side of the quicksand pool, to create a ramp leading to the next floating island.
Quicksand Bridge

Image Credit: IzziBGran / GamifiedLife, LLC
Unstable Scaffolding

Image Credit: IzziBGran / GamifiedLife, LLC
Guard Monkey
Take note of the monkey guarding the plank on the next island. You will need that plank before you’re done, but the monkey won’t give it to you, yet.
So, keep your eyes out for something to use in trade and turn the other way.

Image Credit: IzziBGran / GamifiedLife, LLC
Blue Crystal
Drop the vertical plank on the left side of the Monkey’s island to make another bridge. Continue up the plank toward the Blue Crystal.
There is a lot to do in the next section, but it’s most efficient to get rid of the Blue Crystal first.
So, turn left again, cross the plank to the Blue Crystal, and use your Royal Pickaxe to destroy it.

Image Credit: IzziBGran / GamifiedLife, LLC
Golden Bananas
Three of the crystals are gone. You need the board from the Monkey to reach the final one. It’s time to turn your attention to finding some Golden Bananas to trade for it.
Remove the Sandstone deposits scattered around the floating island on the Blue Crystal’s side of the Windcaller. Push the large barrel out of the way to get them all. There is a bunch of Golden Bananas, hidden among the Sandstone deposits furthest away from the Windcaller.
Pro Tip: If the Golden Bananas don’t show up right away, make sure you have destroyed the red, yellow and blue crystals. Once they are gone, the bananas should appear near the large barrel.
Sandstone Deposits

Image Credit: IzziBGran / GamifiedLife, LLC
Golden Bananas

Image Credit: IzziBGran / GamifiedLife, LLC
More Monkey Business
Return to the Monkey guarding the plank and make your exchange.
The Monkey is very happy to take the Golden Bananas off your hands and hand over the plank. It was just a wooden plank, after all, and the bananas are golden!

Image Credit: IzziBGran / GamifiedLife, LLC
Green Crystal
Head back up the plank bridge, past the side of the Windcaller that used to hold the Blue Crystal, and continue around. Use the plank you received from the Monkey to create a bridge to the small platform next to the final crystal.
You’ve reached the Green Crystal. Pull out your Royal Pickaxe once again and destroy it.

Image Credit: IzziBGran / GamifiedLife, LLC
A Timely Rescue
As soon as the Green Crystal is destroyed, the Windcaller starts to shake and drop to the ground.
Aladdin and the Magic Carpet come flying over to pick you up and together the three of you return to the ground.
Carpet Diem Quest Task: Return to Agrabah.

Image Credit: IzziBGran / GamifiedLife, LLC

Image Credit: IzziBGran / GamifiedLife, LLC
Time to Relax
You did it. The Windcaller is no longer a threat to Agrabah!
Talk to Aladdin and Jasmine. It’s time to convince them to join you in Dreamlight Valley.
Carpet Diem Quest Task: Talk to Aladdin in the Central Market.
Carpet Diem Quest Task: Talk to Jasmine in the Central Market.

Image Credit: IzziBGran / GamifiedLife, LLC
A Small Home
Return to Dreamlight Valley and work with Scrooge to build a house for Aladdin and Jasmine. He’ll have it completed in no time, for just 20,000 Star Coins.
Carpet Diem Quest Task: Return to the Valley and place Aladdin and Jasmine’s House.
Carpet Diem Quest Task: Unlock Aladdin and Jasmine’s House using the Scrooge McDuck Sign.

Image Credit: IzziBGran / GamifiedLife, LLC
Welcome Jasmine
As soon as Jasmine and Aladdin’s Dreamlight Valley home is complete, Jasmine joins you in the Valley.
Welcome home Jasmine!
Carpet Diem Quest Task: Welcome Jasmine.
Carpet Diem Quest Task: Talk to Jasmine.

Image Credit: IzziBGran / GamifiedLife, LLC
Welcome Aladdin
Head back into the Aladdin Realm and talk to Aladdin.
Your timing is great. He just finished up some odds and ends that needed to be dealt with before he could leave. Now he and the Magic Carpet are ready to join you and Jasmine in Dreamlight Valley.
Carpet Diem Quest Task: Return to Aladdin Realm and talk to Aladdin in the Central Market.
Carpet Diem Quest Task: Return to the Valley with Aladdin.

Image Credit: IzziBGran / GamifiedLife, LLC
A Carpet Companion
It’s great to have Jasmine, Aladdin and the Magic Carpet back in the Valley.
Unfortunately, Carpet won’t let you ride him all over the Valley. But you can hop on board long enough to take some pictures!
So, grab a few pictures and let your new Villagers settle in.
Carpet Diem Quest Task: Talk to Aladdin.
Carpet Diem Quest Task: Equip the Magic Carpet from the Companions section of your Inventory, then take a picture with him.

Image Credit: IzziBGran / GamifiedLife, LLC
The Adventures Continue


Jasmine and Aladdin’s adventures continue Dreamlight Valley. Join Jasmine in The Enchanted Flower. Plus, don’t miss the Aladdin Realm Keys Hidden Quest.
In This Article
Disney Dreamlight Valley Guides
- Storybook Vale Critters Guide
- Navigating Storybook Vale
- Goofy's Storybook Vale Stalls
- All Storybook Vale Recipes
- All Blocked Chests in SV Trials
- Wild Woods Fairy Tale Trial
- Teapot Falls Fairy Tale Trial
- Fallen Fortress Fairy Tale Trial
- Elysian Fields Mythic Trial
- Fiery Plains Mythic Trial
- Statue's Shadow Mythic Trial
- Maleficent's Castle
- Mount Olympus
-
- Ariel
- Beast
- Belle
- Daisy
- Donald
- EVE
- Fairy Godmother
- Gaston
- Goofy
- Jack Skellington
- Jafar
- Kristoff
- Maui
- Merlin
- Mickey Mouse
- Mike Wazowski
- Minnie Mouse
- Mirabel
- Moana
- Mother Gothel
- Mulan
- Mushu
- Olaf
- Oswald
- Prince Eric
- Pumbaa
- Rapunzel
- Remy
- Scar
- Scrooge McDuck
- Simba
- Stitch
- Sulley
- The Forgotten
- Tiana
- Timon
- Ursula & Vanessa
- Vanellope
- WALL-E
About the Author: IzziBGran
Get the latest news & updates