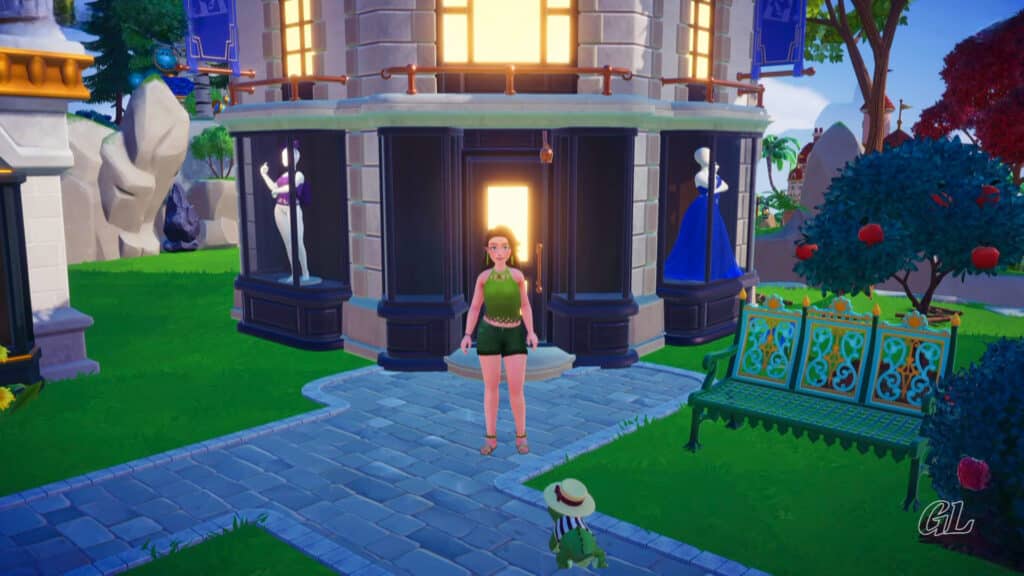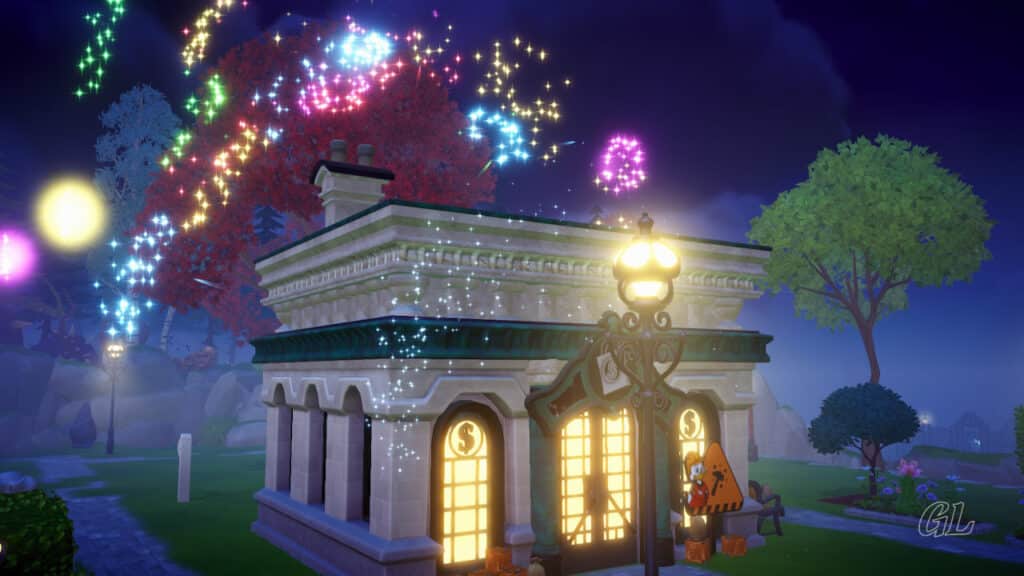
Image Credit: IzziBGran / GamifiedLife, LLC
Home Improvements 101 and more
Scrooge McDuck’s has wise advice; ” The most important investment you can make is in your home!” This is very true in Disney Dreamlight Valley. Investing in home improvements opens a whole new set of possibilities. Use your imagination and flex your creativity. In this guide, we’ll show you how.
Complete:
Scrooge Quest: Scrooge McDuck’s Grand Opening
Start:
Scrooge Quest: Dreamlight Valley Economy 101
Resources you will use during this quest.
- none
Ingredients you will use during this quest.
- none
Your New Home
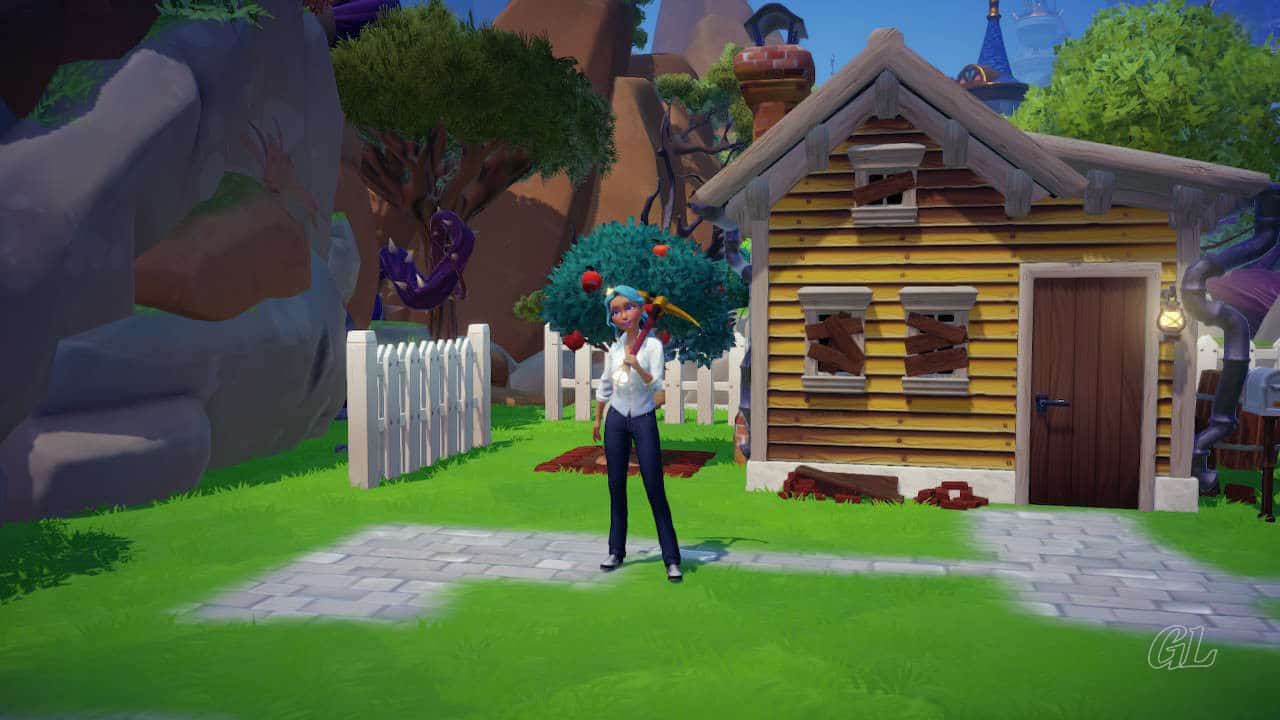
Arriving in Disney Dreamlight Valley, you find yourself the happy owner of a small boarded up, dilapidated and dirty house. Your “new” house comes equipped with a nice Wood Vintage Storage Chest, which doesn’t hold much, and not much else.
At the on-set, your resources are very limited, so there isn’t much you can do to improve your living space.
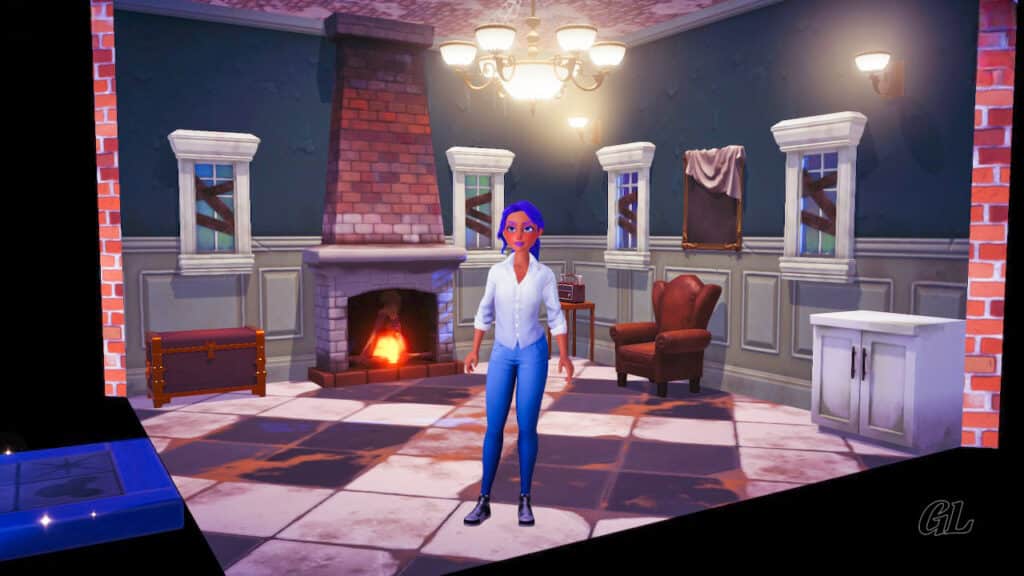
Image Credit: IzziBGran / GamifiedLife, LLC
Small Home Improvements
It doesn’t take long before you meet Scrooge McDuck and start to gain access to a variety of small home improvement options.
Scrooge’s Store opens in Scrooge McDuck’s Grand Re-Opening, giving you the ability to buy all sorts of furniture and decor items, if you have the right amount of Star Coins, of course. His inventory changes daily and the number of items he has for sale increases over time.
Let the interior decorating home improvements begin!
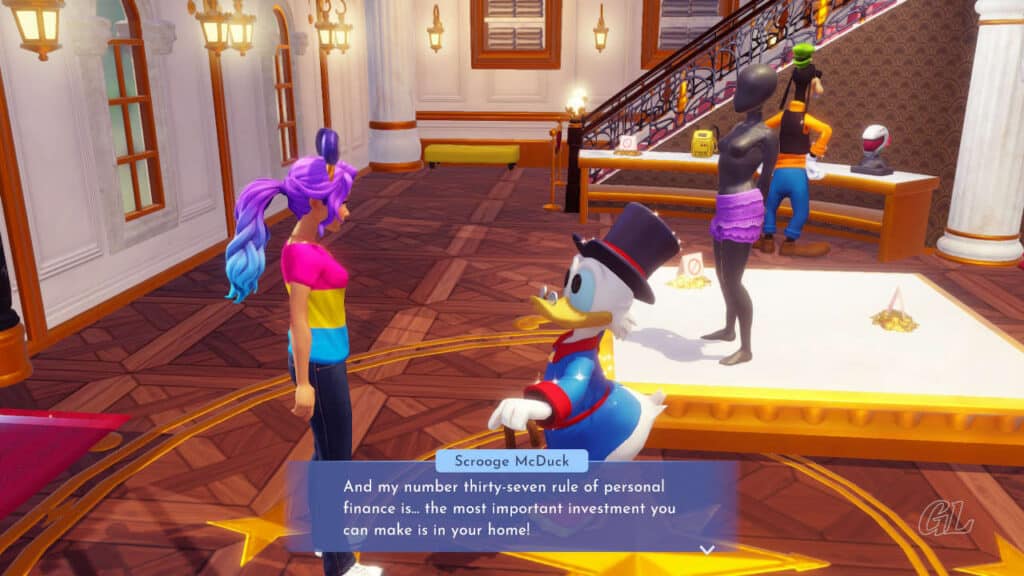
Image Credit: IzziBGran / GamifiedLife, LLC
The Wood Vintage Chest
Remember the Wood Vintage Chest that comes with your home? This particular storage chest is rather unique and deserves its’ own paragraph.
The Wood Vintage Chest is actually a “shared storage” chest. Once Scrooge’s store opens, you can buy additional chests like this one (although the colors may vary) and place them anywhere in the valley. Anything placed in any one of the Wood Vintage Chests, can be accessed from all of them.
The amount of storage inside the chests, however, is limited and also shared. So, if you open a chest and see 8 slots, that’s all you have to use no matter how many similar chests you place in your Valley.
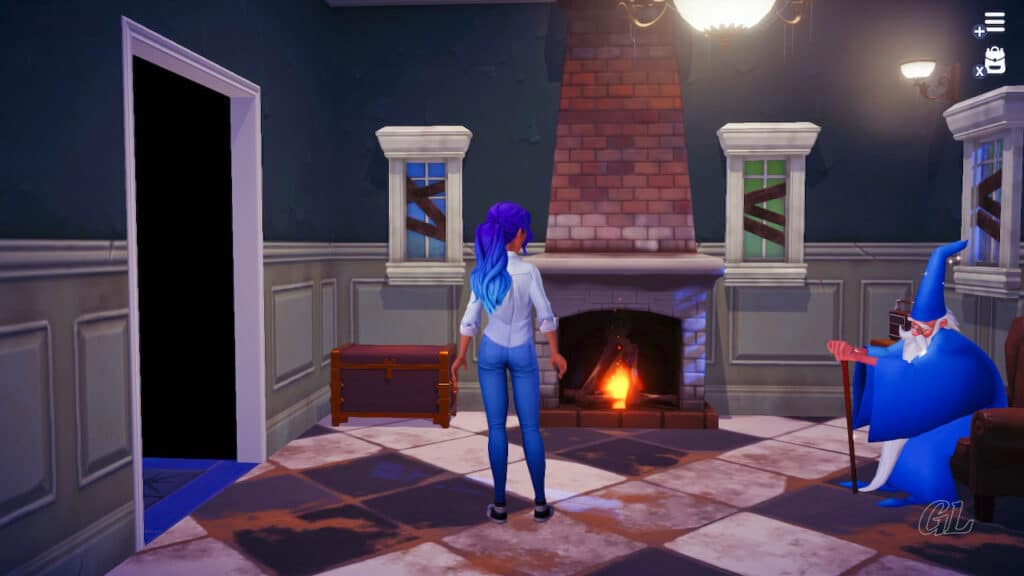
Image Credit: IzziBGran / GamifiedLife, LLC
Elevator vs Scrooge Construction Sign
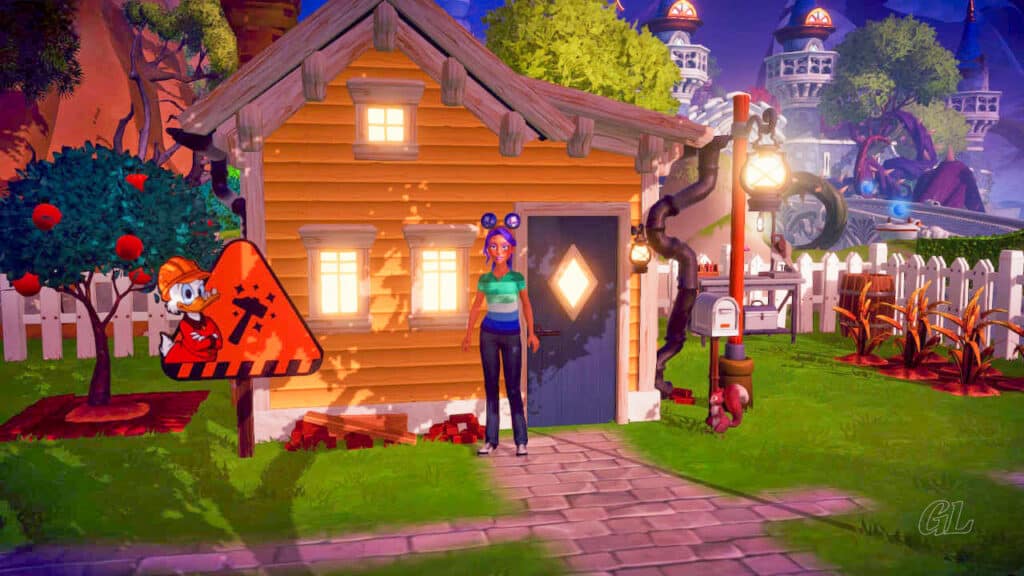
In Dreamlight Valley Economy 101, Scrooge provides you with the means to start making some big home improvements. During this quest, he installs an elevator to the inside of your home and adds the Scrooge Construction Sign to the outside.
Hmm, the only way to figure out what each of these actually does is to invest Star Coins, a precious commodity early in the game. Here is a summary, for your home improvement convenience.
Elevator:
- Use the elevator to increase the size of existing rooms or add rooms and floors to your house.
- It does not increase inventory storage space in your Wood Vintage Chest.
Scrooge’s Construction Sign:
- Talk to Scrooge at the Scrooge Construction Sign to upgrade the outside of your house. Scrooge Construction removes boards from windows or changes the exterior appearance to make it look like you are adding floors and making the house larger. However, using the Scrooge Construction Sign does not actually “add” floors or change room sizes inside the house itself.
- With each exterior upgrade, you get additional storage space in your Wood Vintage Chest. That alone can be worth the investment.
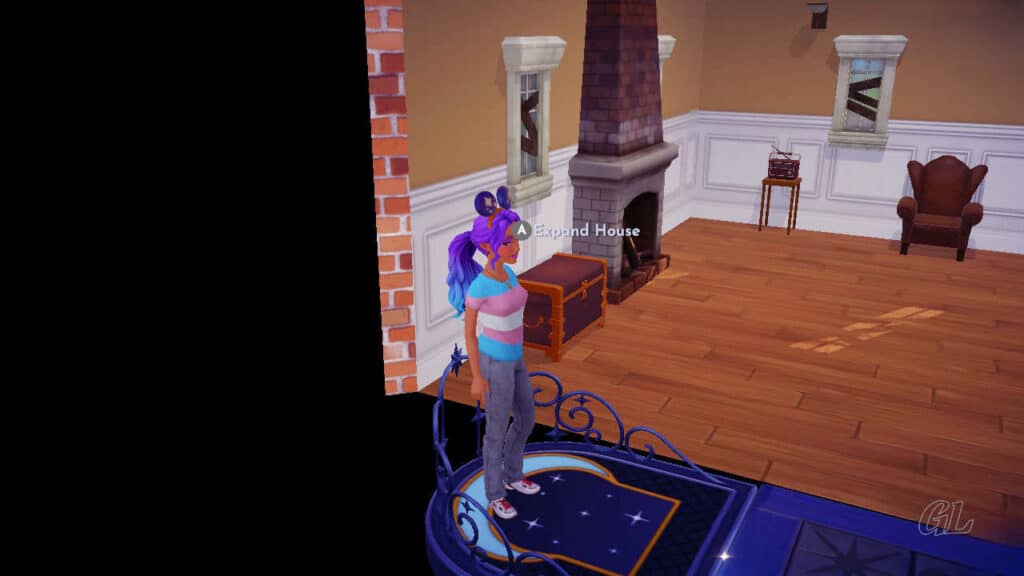
Image Credit: IzziBGran / GamifiedLife, LLC
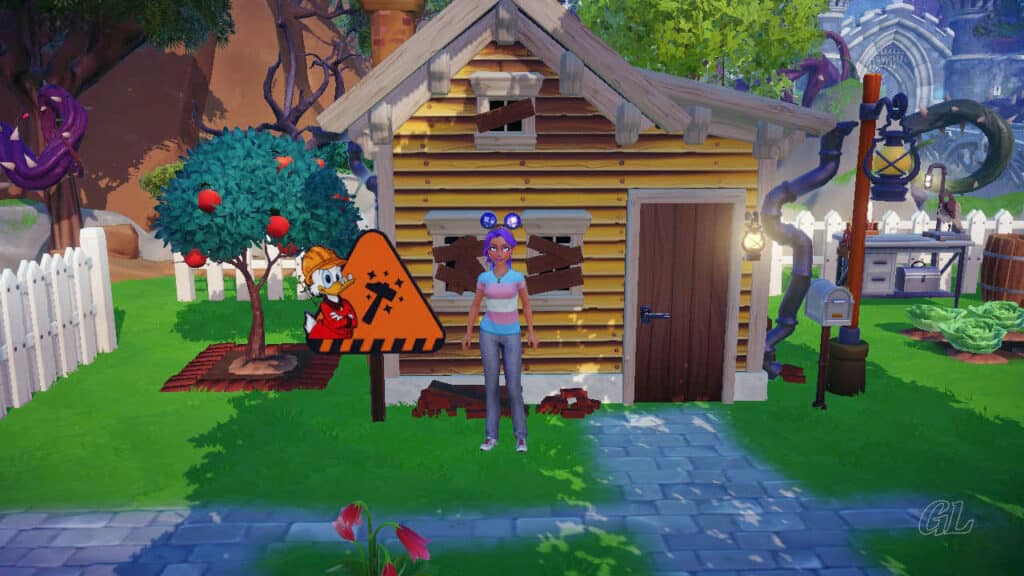
Image Credit: IzziBGran / GamifiedLife, LLC
Elevator: Main Room Size Expansion
Start your home improvements by changing the size of your homes first floor Main Room. Yes, at the beginning of the game it’s your house’s only room, but that is about to change, so bear with me.
Head to the Elevator and let’s get started.
Bring up the Elevator menu and click “Expand”. The first two upgrades that you do, concentrate on adding more floor space to the Main Room.
Cost:
- Main Room upgrade 1: 1000 Star Coins
- Main Room upgrade 2: 2000 Star Coins
With the second Main Room upgrade, the Home Expansion menu changes. It shows that additional rooms can be added to the floorplan.
Unfortunately, the ability to actually add the rooms is currently “locked”. Before this option will unlock, you need to invest in some exterior work, using Scrooge’s Construction Sign outside.
So, the only additional and purely optional thing you can do here, just now, is to click “edit” and name your Main Room.
Pro Tip: The “+” signs on all the Elevator and Home Expansion menus means “Add”, as in Add or enlarge a room. It does not stand for the controller button you need to press. So, to make your home improvements, always move your cursor to highlight the menu option, in this case the “Expand”, and click the appropriate “enter” button on the controller.
Click on “Expand”
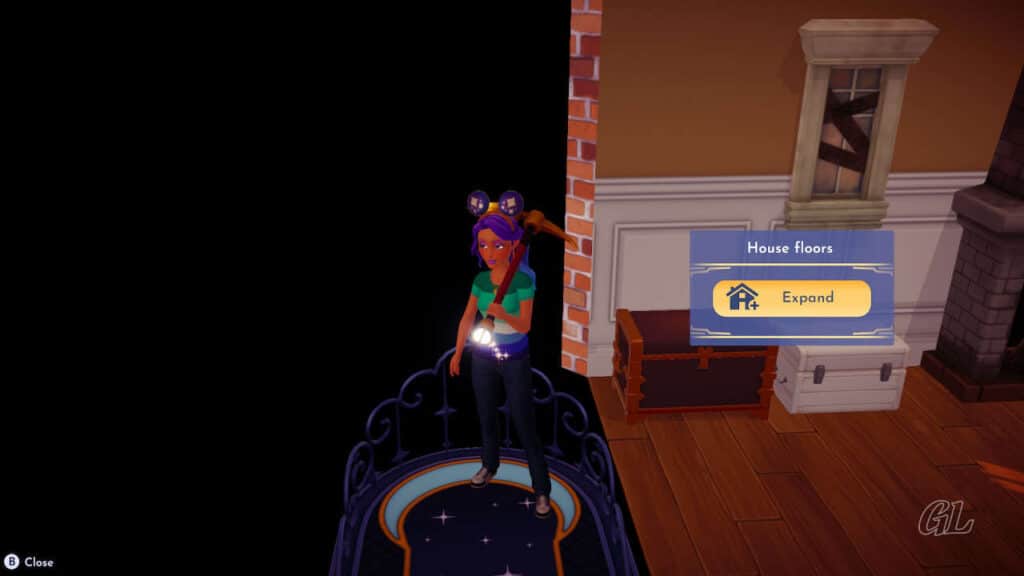
Image Credit: IzziBGran / GamifiedLife, LLC
1st Upgrade-Main Room
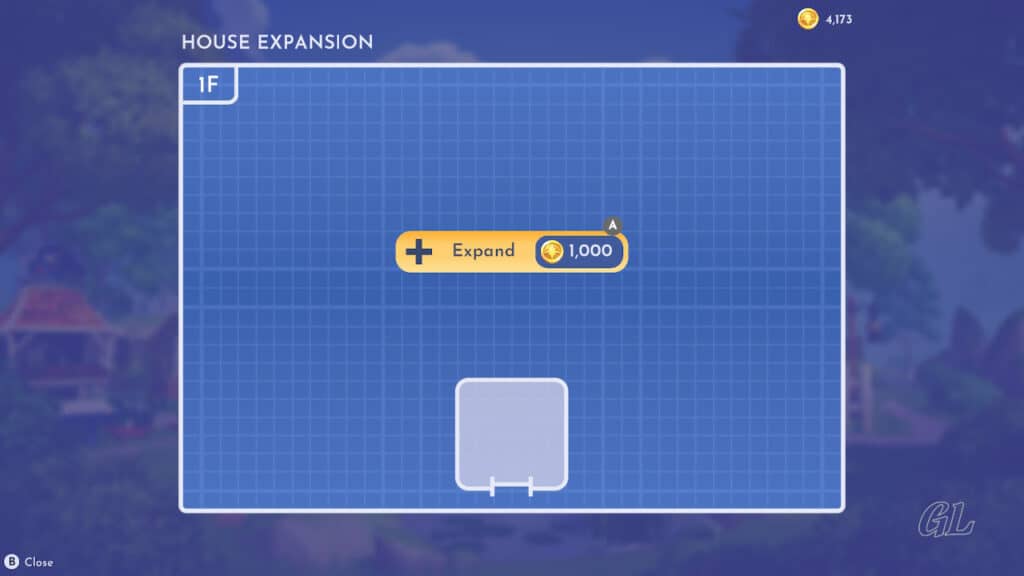
Image Credit: IzziBGran / GamifiedLife, LLC
2nd Upgrade-Main Room
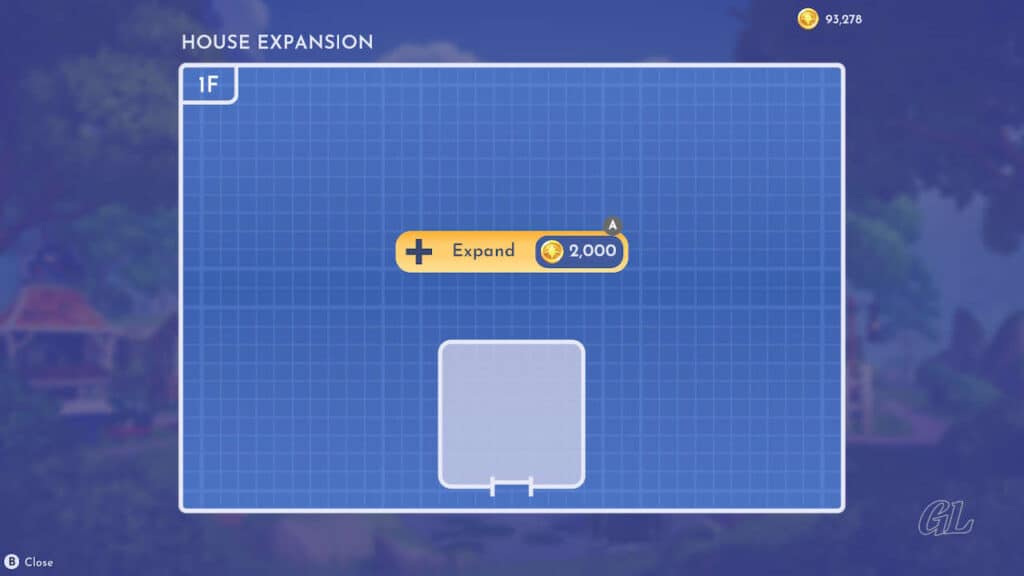
Image Credit: IzziBGran / GamifiedLife, LLC
Future Expansion Tickler
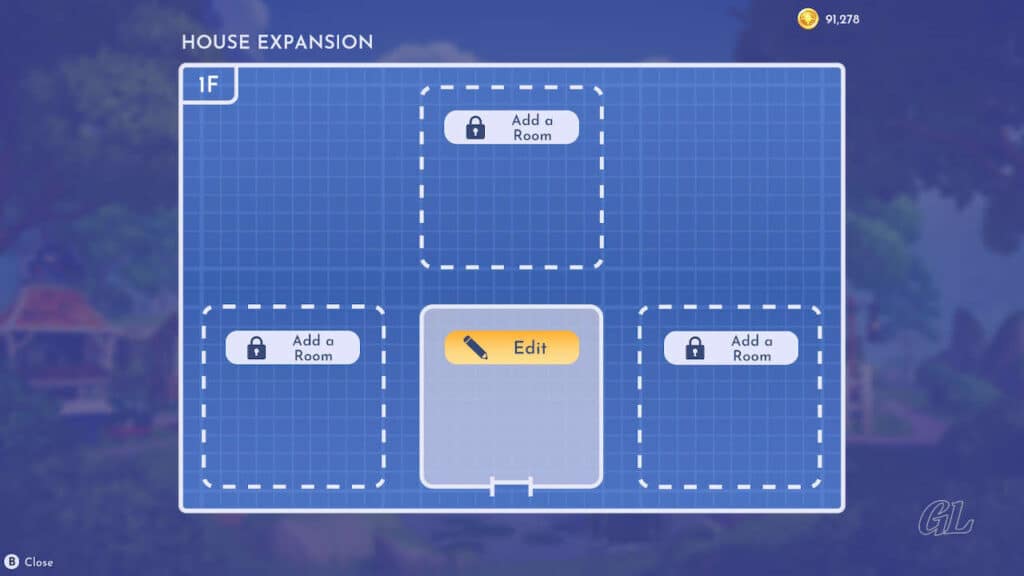
Image Credit: IzziBGran / GamifiedLife, LLC
Before Upgrade
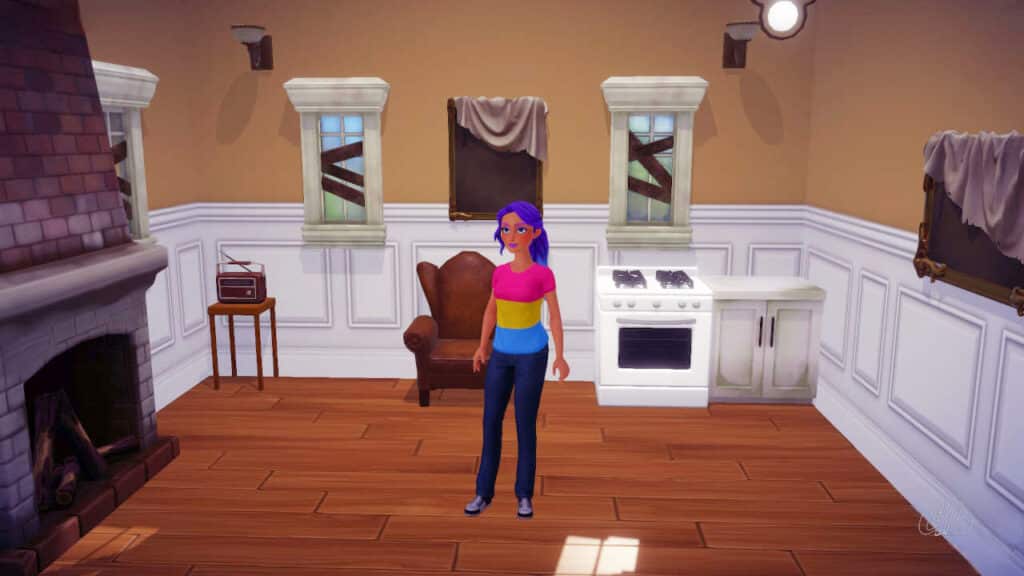
Image Credit: IzziBGran / GamifiedLife, LLC
Increased Room Size
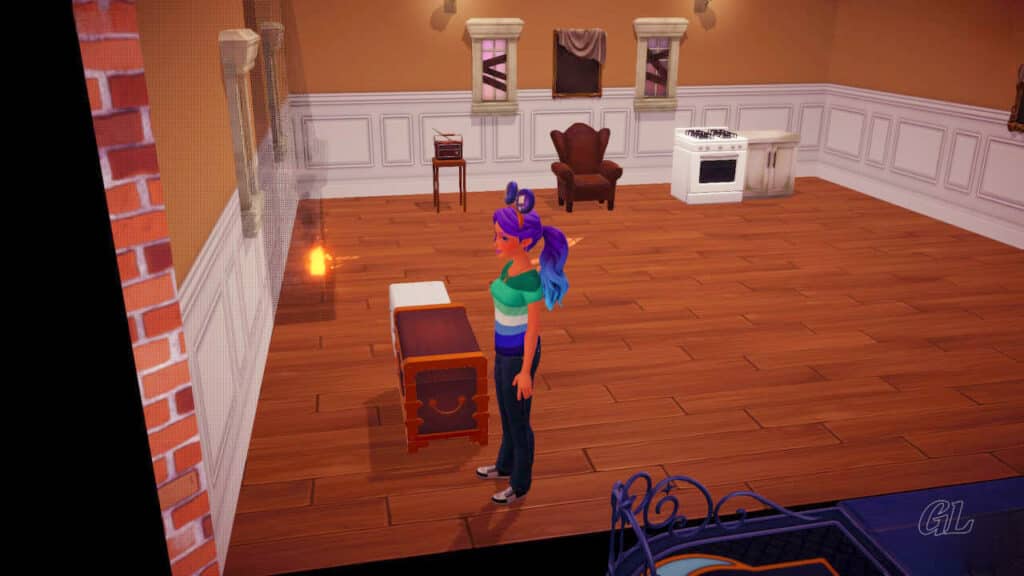
Image Credit: IzziBGran / GamifiedLife, LLC
Boarded Up Windows Be Gone
To continue with your home improvements, head outside. In the front of your house, you’ll see the Scrooge McDuck’s Construction Sign.
When you’re tired of looking at the boarded-up windows, check out what Scrooge’s firm has to offer. Interacting with the sign, will bring Scrooge over to discuss payment.
The first upgrade to the exterior of your house is going to cost you 2000 Star Coins. For this measly amount, to Scrooge not to you, you can have a nice clean home exterior with the boards removed from your windows. In addition, your home’s Wood Vintage Chest gets one more row of usable space for a total of 16 slots! More Storage, Hooray!
The other hidden benefit to this first exterior upgrade, is that the process unlocks the elevator’s ability to add more rooms to your main floor.
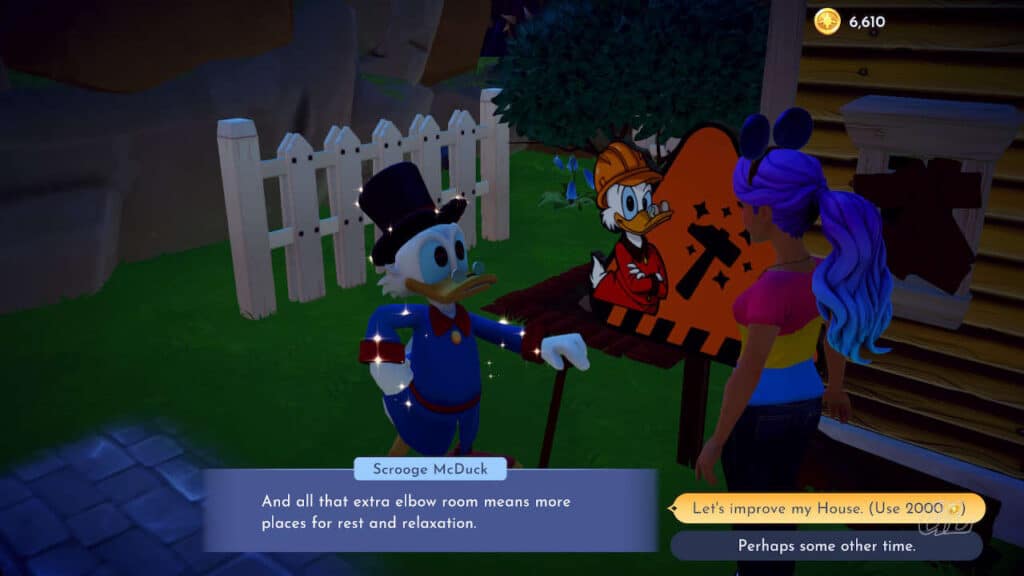
Image Credit: IzziBGran / GamifiedLife, LLC
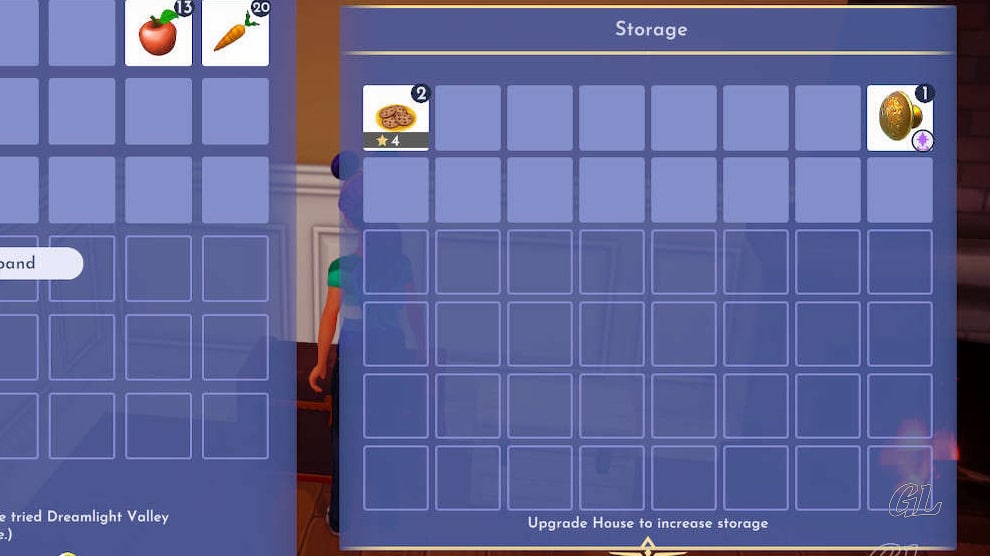
Image Credit: IzziBGran / GamifiedLife, LLC
Your First Exterior House Upgrade
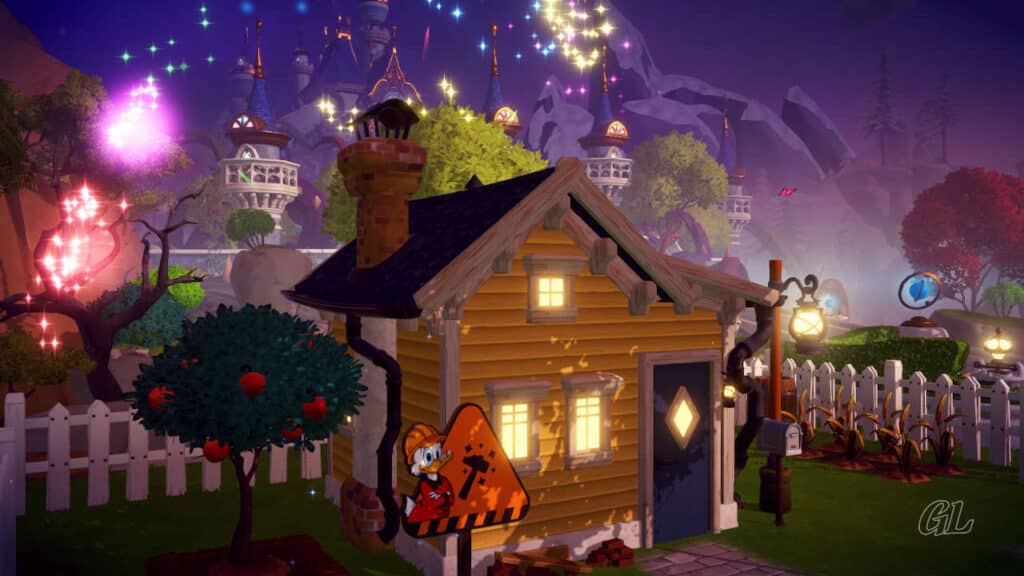
Image Credit: IzziBGran / GamifiedLife, LLC
Back to the Elevator: Adding Rooms
Back in the Elevator, click “Expand” once again to display the Home Expansion menu. The locked icons on the 3 side rooms are now gone.
On February 26, 2025, Update 15 of Disney Dreamlight Valley rolled out. It brought some significant changes to the room sizing options and menus. We’ll show a few of the difference, for those interested seasoned players.
To add a Room:
- Highlight the “Add a Room” or large “+” box (Update 15) and click the “enter” button.
- Prior to Update 15, a Popup giving you 3 rooms size options appears. After Update 15, a “Room” Popup appears.
- The “Room” menu shows that your room size will start as a 6×6 square.
- “Unlock” the 6×6 room, for 1000 Star Coins. This is a required before you can make any changes to the room’s size.
- Optional: Use the pencil icon to give the room a name.
At this point, you can stay in the Room menu and resize your room, or back out and come back later.
Pro Tip: The Main Room of any floor must be at full size (upgraded twice) before you can add more rooms to that floor.
Prior to Update 15
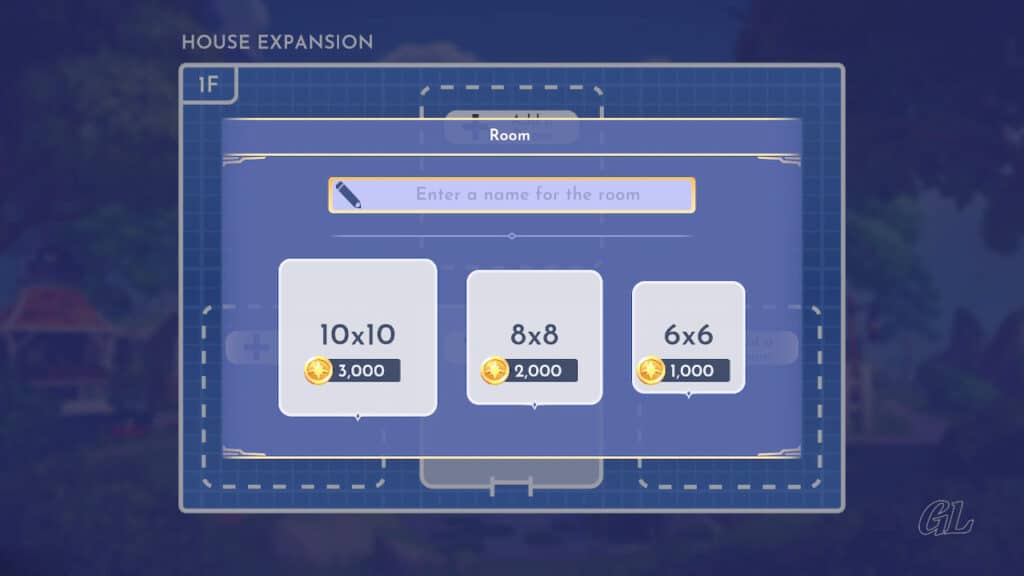
Image Credit: IzziBGran / GamifiedLife, LLC
After Update 15
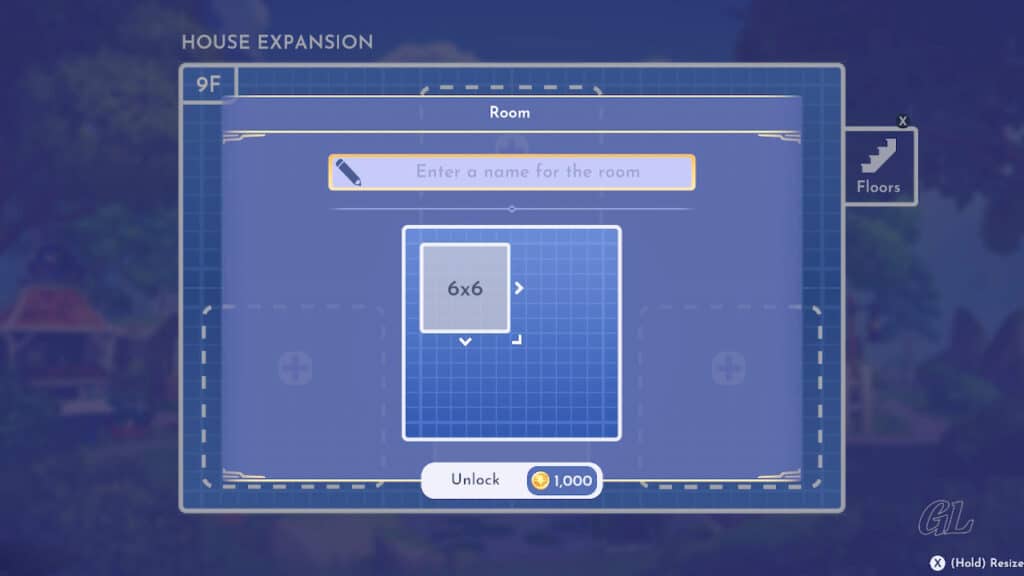
Image Credit: IzziBGran / GamifiedLife, LLC
Sizing Your Rooms
Once a room is unlocked, the Elevator’s Home Expansion menu changes to show that the new room is connected to your Main Room.
The new room contains a Pencil “edit” icon and a Trash Can. Use the Pencil to change the size of your room. Don’t worry. The size can be changed again later, so feel free to pick what works for your current needs and budget without concern.
How to Adjust Room Size:
- In Elevator Menu: Click “Expand”
- Click the Pencil to bring up the “Room” menu.
- New rooms start as a 6×6 square. There are 3 “>” arrows next to the box.
- Highlight an arrow and hold down the “x” button (Switch). The options in the lower right of the screen change as follows.
- Right Arrow – Shrink & Expand Horizontally
- Down Arrow – Shrink & Expand Vertically
- Corner Arrow – Shows all 4 options above
- Click the arrows repeatedly, while holding down “x”, to select the size you want.
- Caution: Release the “x” button to see the actual price of the room size upgrade. The cost varies, depending on the size you choose.
- 2000 Star Coins: 6×8, 6×10, 6×12, 8×6, 10×6, 12×6, 8×8
- 3000 Star Coins: 8×10, 8×12, 10×8, 12×8
- 5000 Star Coins:12×10, 10×12, 12×12
- Select “Unlock” and confirm the Room Size Change.
Change the Size Again:
A room can be resized any number of times. There is a cost, however, even when making the room smaller.
Side Room Unlocked
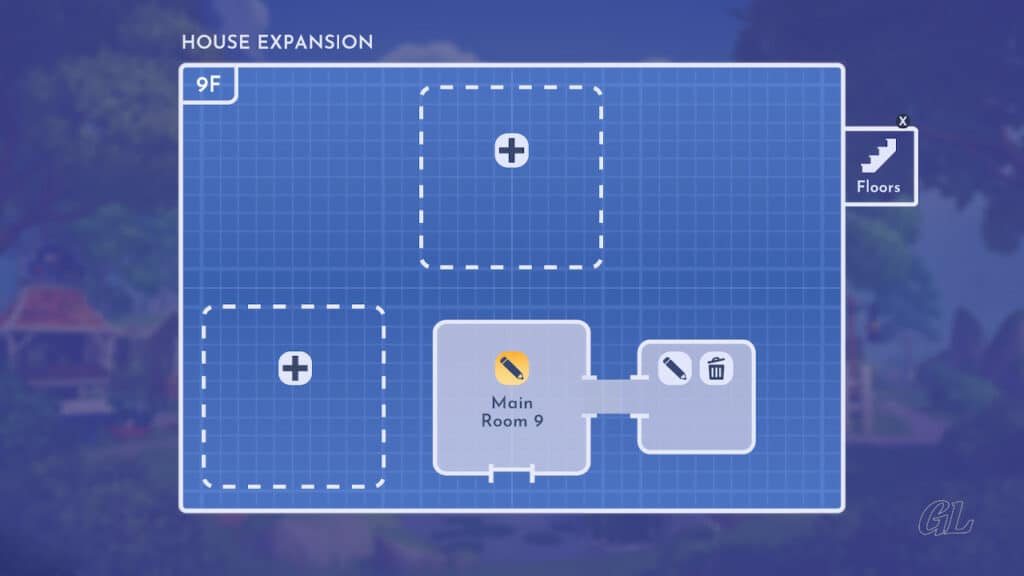
Image Credit: IzziBGran / GamifiedLife, LLC
Expanding Room Size
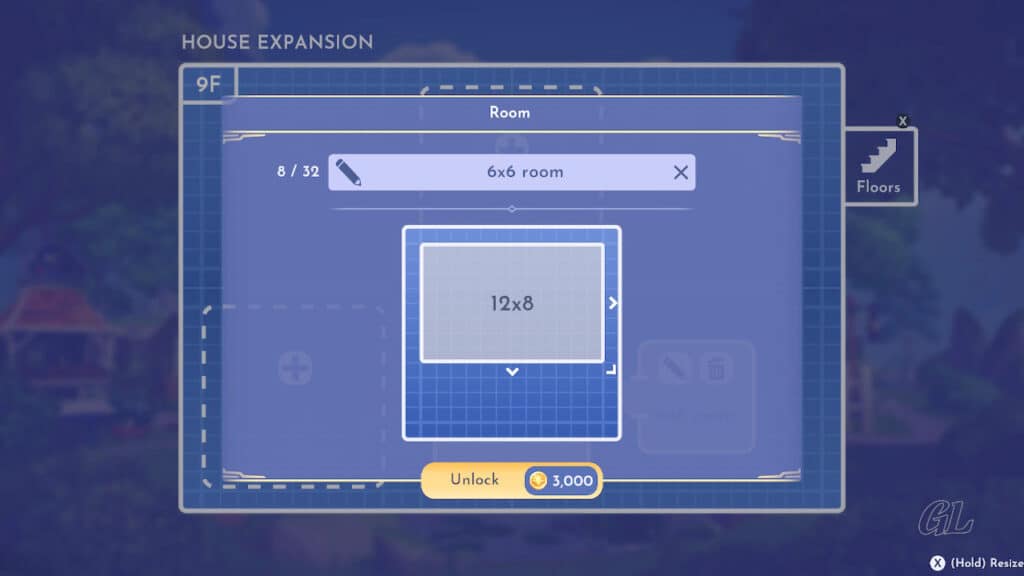
Image Credit: IzziBGran / GamifiedLife, LLC
Rooms with Furniture
You can adjust the sizes of rooms that already have furniture placed in them.
Enlarging a room will have no impact on its’ contents. However, if the room is made smaller, all furniture will be removed and placed back in your Inventory.
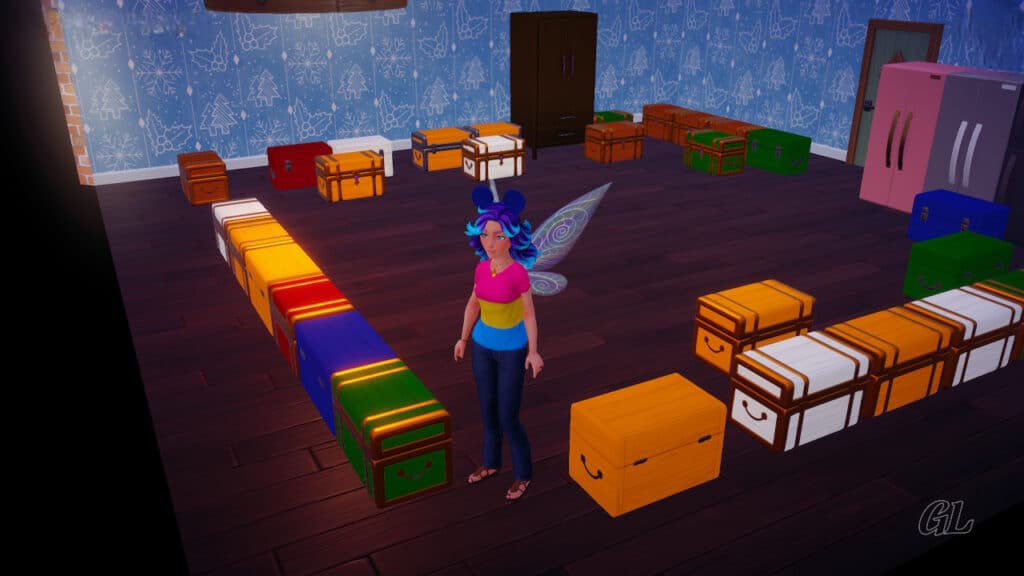
Image Credit: IzziBGran / GamifiedLife, LLC
The Trash Can
Each side room also comes with a Trash Can icon. Use it to completely delete your room.
All furniture that you have placed inside the room is removed and put back in your inventory.
The room can be re-added at the same size or smaller without additional cost. However, if you want to make it larger, be prepared to pay.
Also, after a room is re-added, any additional size adjustments made to the room, even just to get it back to the size it was before you deleted it, will cost you.
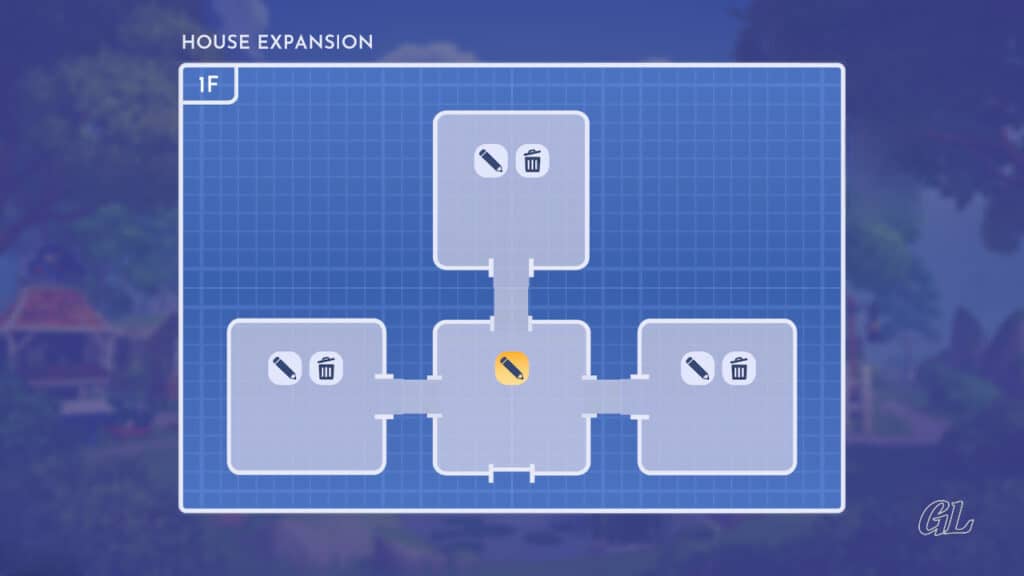
Image Credit: IzziBGran / GamifiedLife, LLC
Move the Door
Doors automatically appear on each wall with an unlocked connecting room. Regardless of the room size, the doors will, by default, be centered on the wall.
There are times, however, when having the door in the center gets in the way of your room design.
To solve this problem, you can slide the door to a new position along the wall. This affects only the room you’re in. It does not impact the door position in the room on the other side of the wall.
How to Move Your Inside Doors:
- From inside your home, select the Furniture Menu
- Close the detailed Furniture Panel (click B)
- Move your Hand Cursor to the door in the room until it is highlighted
- Click “A” to grab the door and slide it along the wall.
- Click “A” again to release/place the door (or B to cancel)
Grab & Drag
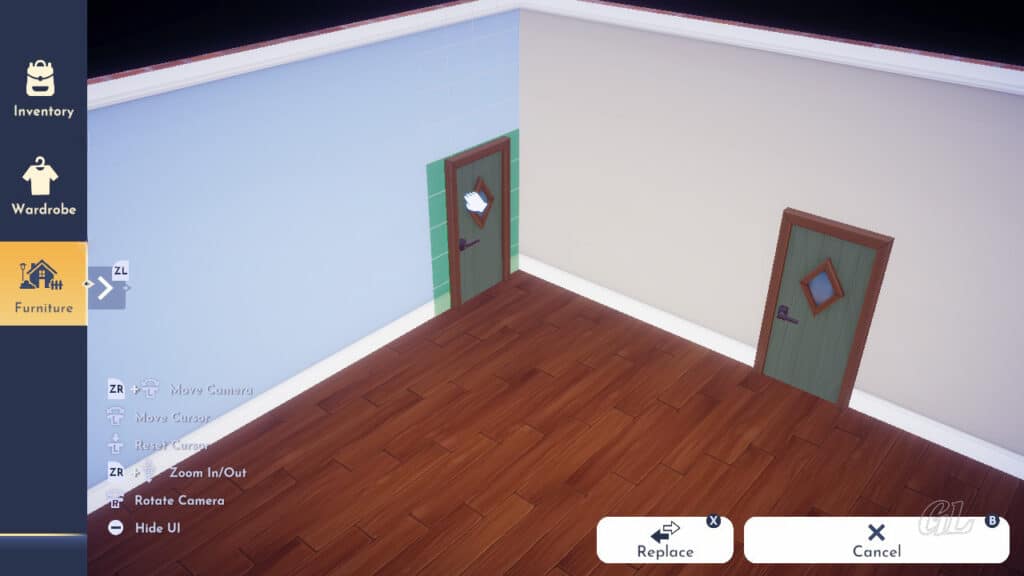
Image Credit: IzziBGran / GamifiedLife, LLC
A New Position
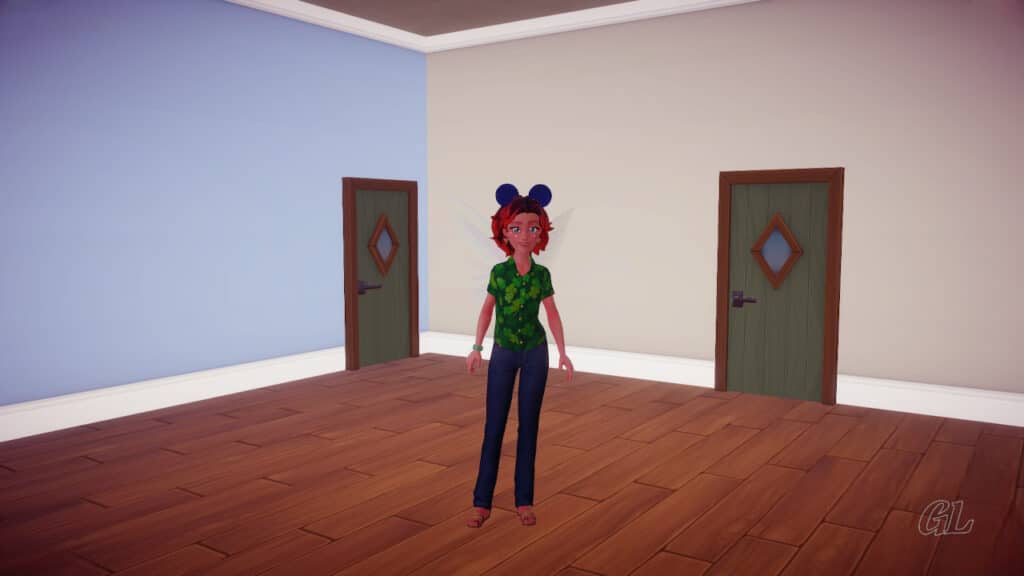
Image Credit: IzziBGran / GamifiedLife, LLC
Change Door Styles
As you progress through the game, there will be opportunities to obtain new inside doors for your home. They can be a reward for participating in a Star Path or simply found on sale in Scrooge’s Store.
Unlike wallpaper or flooring that you can purchase once and use as often as you like, you need to buy the number of doors you want to use.
So, once you have a new door and would like a couple more, head to Scrooge’s Store. You can purchase additional doors of the same style from his on-demand catalog by talking to him. This dialog option is unlocked in Customers Know Best.
Scrooge’s On Demand Catalog:
- To access the on-demand catalog, talk to Scrooge and select “I’d like to order some items”.
- Select the dialog option “Furniture”.
- If the door does not show up in the list, make sure you have at least one in your Furniture Inventory. Sometimes, the item must be in your Furniture list (not in use) for Scrooge to sell it.
How to Change a Door:
- In the Furniture Menu, use the Hand Cursor to highlight the door.
- If you have other doors in your Furniture inventory, a “Replace” option will appear in the lower right of the screen.
- Click “x”, to see the “Choose a Replacement” popup containing the list of available doors.
- Select the door you want and click “A” to make the change.
Pro Tip: Inside the boutique, which is opened during You Have Mail, Daisy sells various customizable items, including a white “Basic Diamond Door”. Use the “Touch of Magic” tool to modify it to meet your decor needs.
The doors cost 300 Daisy Coins each. Earn Daisy Coins by completing Boutique Challenges.
Replace Doors
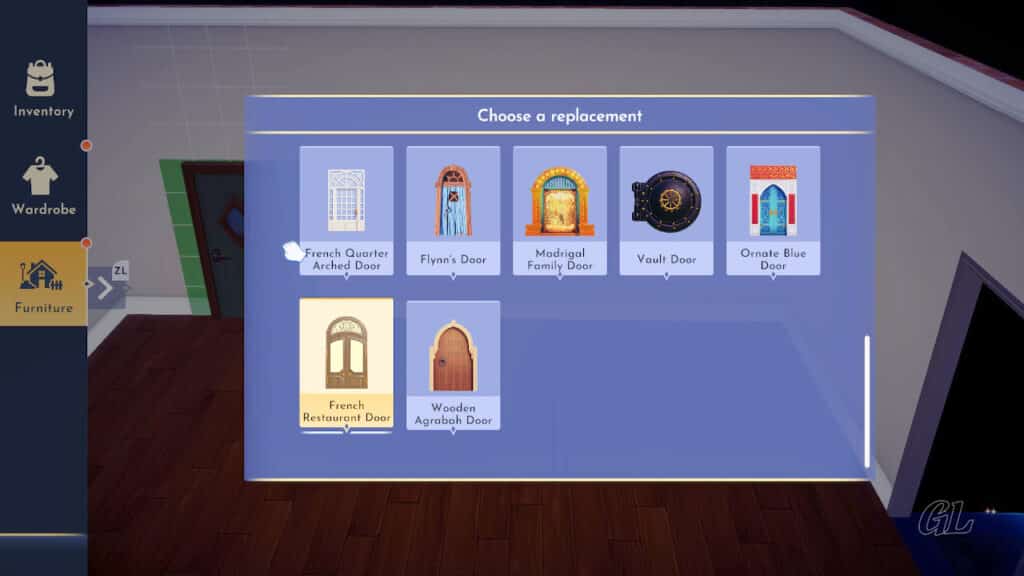
Image Credit: IzziBGran / GamifiedLife, LLC
A New Look
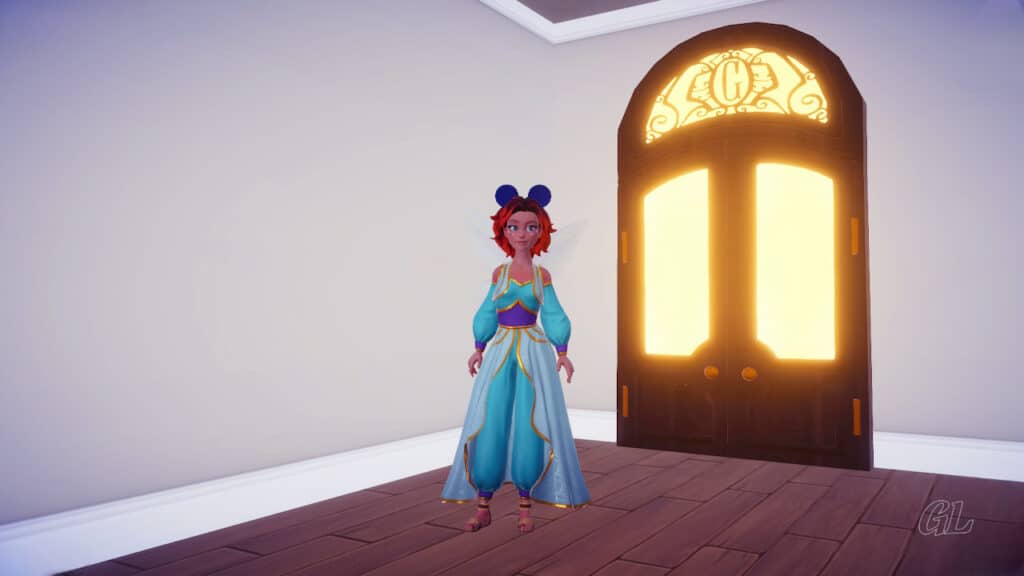
Image Credit: IzziBGran / GamifiedLife, LLC
Adding Floors
Ready to add floors to your home?
Note, you do not need to have all the rooms unlocked on the lower floors, to add a new floor to your home.
To add a Floor:
- Back in the Elevator, click on “Expand” to display the Home Expansion menu. Notice the “Floors” box, with a stairs icon, in the upper right side of the floorplan.
- Click “x” to expand the menu. The list of floors your house currently has is displayed, with the floor you are currently on, highlighted.
- Move your cursor to highlight the “Add a Floor” box and select it to confirm.
- Note: The cost to a floor increases with the number of floors you have in your home.
Your new floor will once again start with just a Main Room. You have the identical home improvement options here as you did on the first floor. Follow the same steps to add rooms and change their sizes.
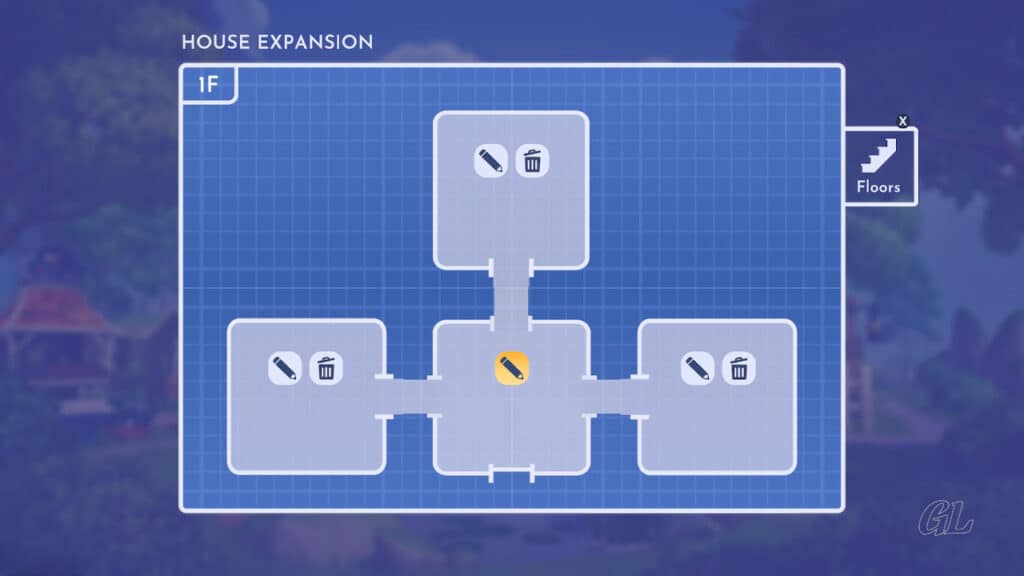
Image Credit: IzziBGran / GamifiedLife, LLC
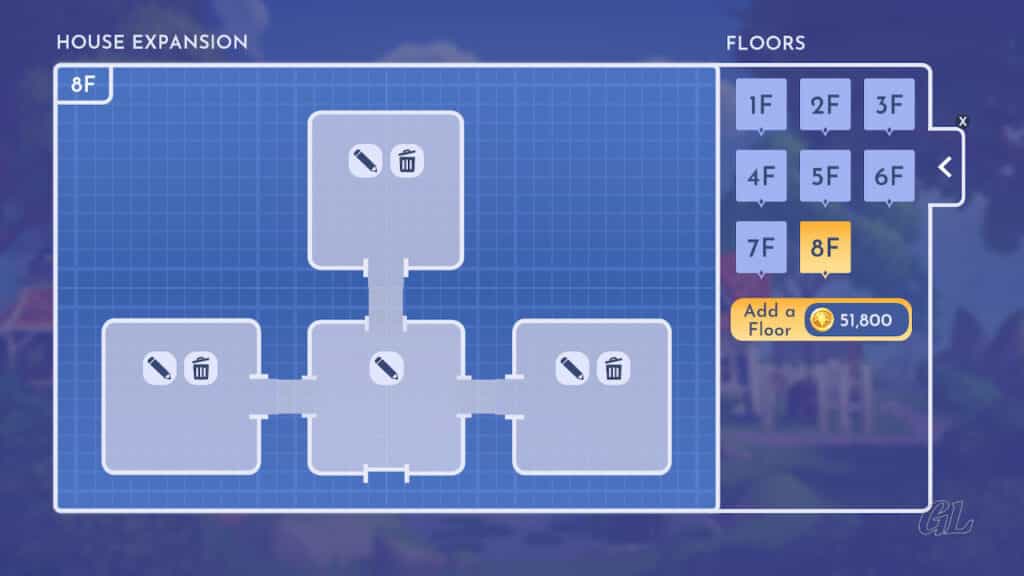
Image Credit: IzziBGran / GamifiedLife, LLC
Scrooge’s Sign: Upgrading Your House Exterior
Time to return our focus to the exterior of the house. The first exterior upgrade is done, but there is still more to do!
Interact with Scrooge’s Construction Sign to continue.
Here’s a summary of all exterior upgrades and what they provide.
First Exterior Upgrade
- Cost: 2000 Star Coins
- Wood Vintage Storage Chest: Adds 1 row (8 slots) of storage for a total of 16 slots
- Exterior Look: Boards are removed from windows. Lights are turned on
- Elevator Feature Upgrades: Unlocks the ability to add and resize up to 3 rooms to the Main Floor.
Second Exterior Upgrade
- Cost: 20,000 Star Coins
- Wood Vintage Storage Chest: Adds 2 rows (16 slots) of storage for a total of 32 slots
- Exterior Look: House now looks like it has a second floor (even if the inside doesn’t)
- Elevator Feature Upgrades: Unlocks the ability to add 1 more floor to your house. 2nd floor can be expanded to include the 3 side rooms.
Third & Final Exterior Upgrade
- Cost: 75,000 Star Coins
- Wood Vintage Storage Chest: Adds 2 rows (16 slots) of storage for a fully upgraded total of 48 slots.
- Exterior Look: Adds a bay window to the house front and roof embellishments, updates the door trim, adds a trellis on the east side and window boxes on the second floor. Scrooge’s Sign is removed.
- Elevator Feature Upgrades: Can add unlimited number of floors. Each can be expanded to have a total of 4 rooms.
- Change Houses: Unlocks ability to replace your house with another using the Furniture>House menu
Reminder: The upgrades only impact the exterior look and Elevator features. Nothing inside changes.
Upgrade 2
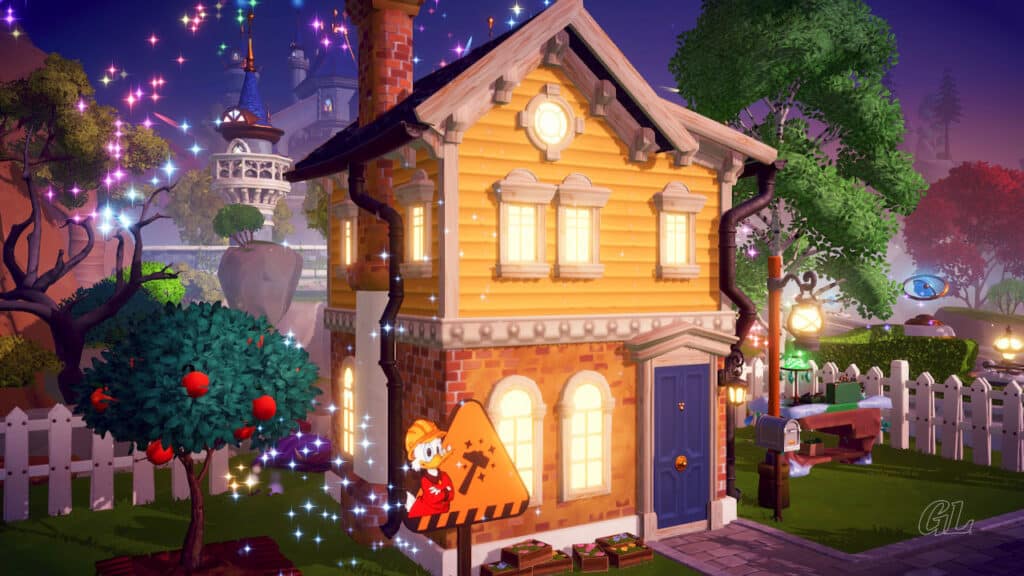
Image Credit: IzziBGran / GamifiedLife, LLC
Upgrade 3
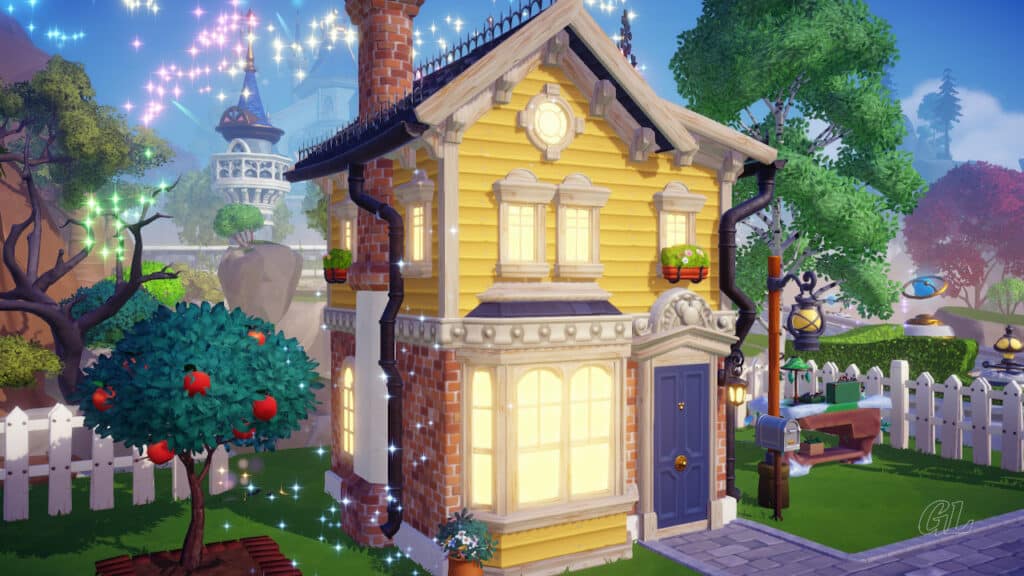
Image Credit: IzziBGran / GamifiedLife, LLC
Replacing Your House
Once your house is fully upgraded, the option to change the outside look of the house becomes available.
Early on, the number of exterior options you have is fairly limited. You start with the ability to select a different color for your “Beginning House”. However, as you play, complete Star Paths and take advantage of the selections available in the Premium Shop, your exterior home inventory grows.
To change (or replace) your main house:
- Stand outside your home
- Enter the Furniture menu and close the detailed Furniture panel
- Use the Hand Curser to highlight and grab your home
- Select the “Replace” option, displayed on the bottom of the screen
- “Choose a replacement” popup menu shows the home styles you have available.
- Highlight the one you want and click “A” to place it
- Note: Each house has a different footprint. Many are much larger than your Beginning House. Adjust the landscape or move things around to get enough room to place the new house.
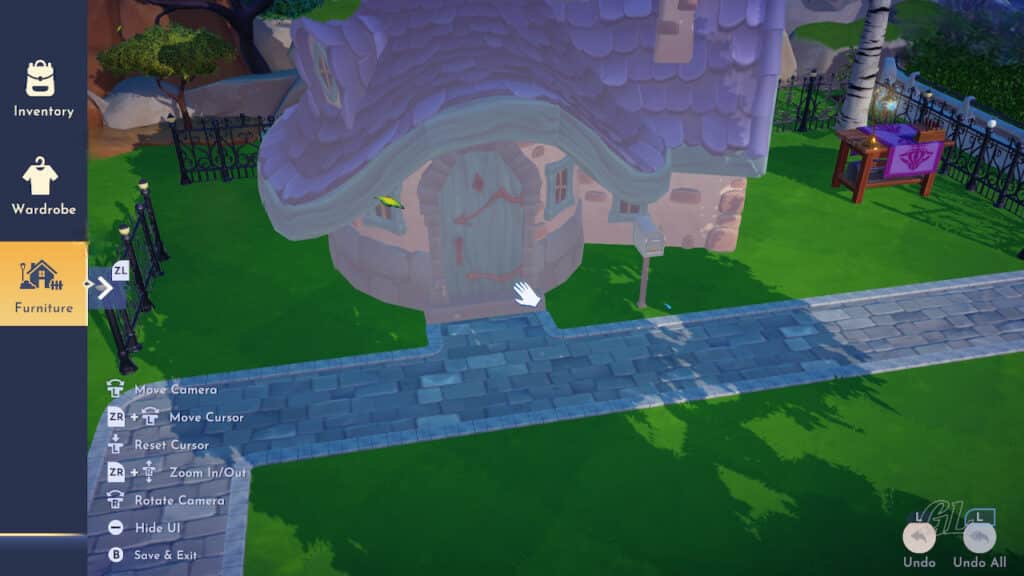
Image Credit: IzziBGran / GamifiedLife, LLC
A Second Home
There are a lot of great houses available for you to use as your Main House in Disney Dreamlight Valley. But you can also use them as a second, or third, fourth, etc. house by place them in other locations in the Valley. They can also be used on the floating islands, Eternity Isle or Storybook Vale.
- Floating Islands become available after completing Merlin’s Quest “Islands in the Sky”.
- Eternity Isle and Storybook Vale are purchasable, with real dollars, DLCs.
How to place an extra home:
- Standing outside, select the Furniture Menu.
- Under Categories, select House.
- Scroll down to the “Player’s Houses” section
- Select the house and click “A” to place it
Extra homes have a single floor, with all 4 rooms open for your use. There is nothing inside except a Wood Vintage Chest, giving you access to your shared inventory.
While you cannot add any additional floors to these houses when they are not used as your Main Home, you can resize & decorate the rooms!
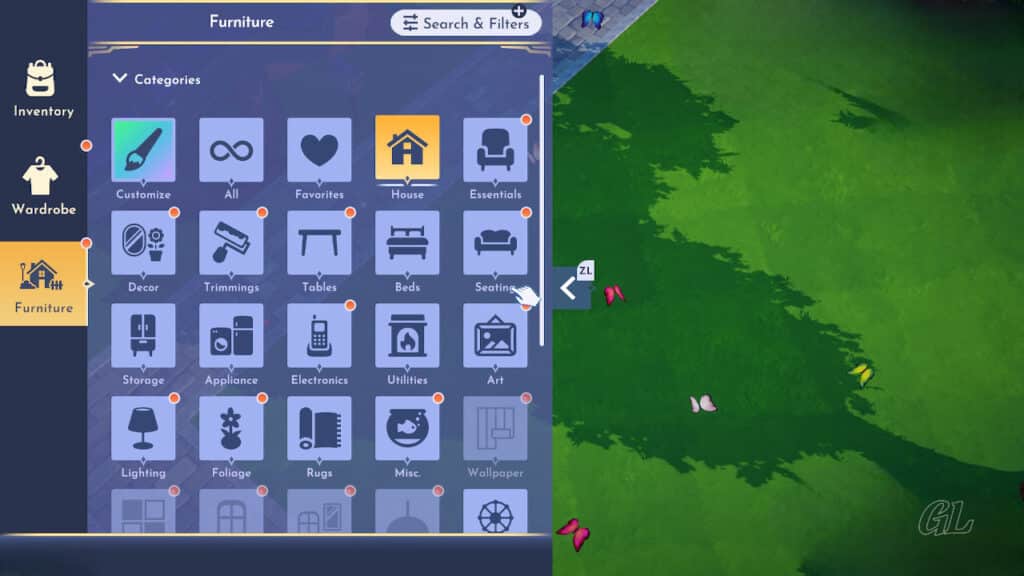
Image Credit: IzziBGran / GamifiedLife, LLC
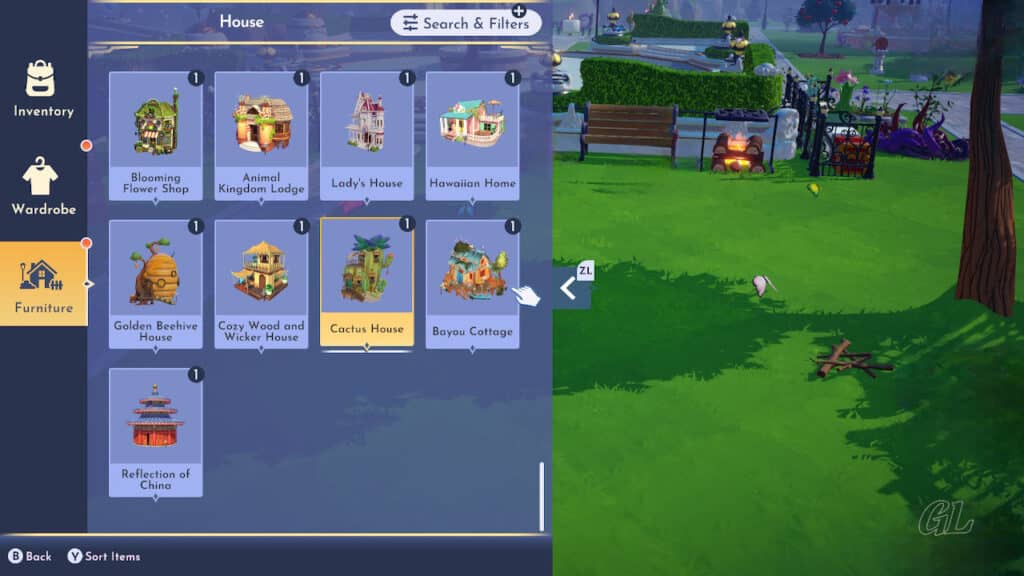
Image Credit: IzziBGran / GamifiedLife, LLC
Decorating
We’ve walked you through making all the structural changes to your home. It’s now time to use your creativity and decorate to your hearts content!
From inside your house, open your Furniture menu and get to work. Scrooge is always available to fill in any gaps in your Furniture inventory. You can also use the Touch of Magic tool to customize any basic white furniture pieces you have.
To quote Merlin… “Remember, your imagination is a powerful magic”. Put it to work and enjoy!
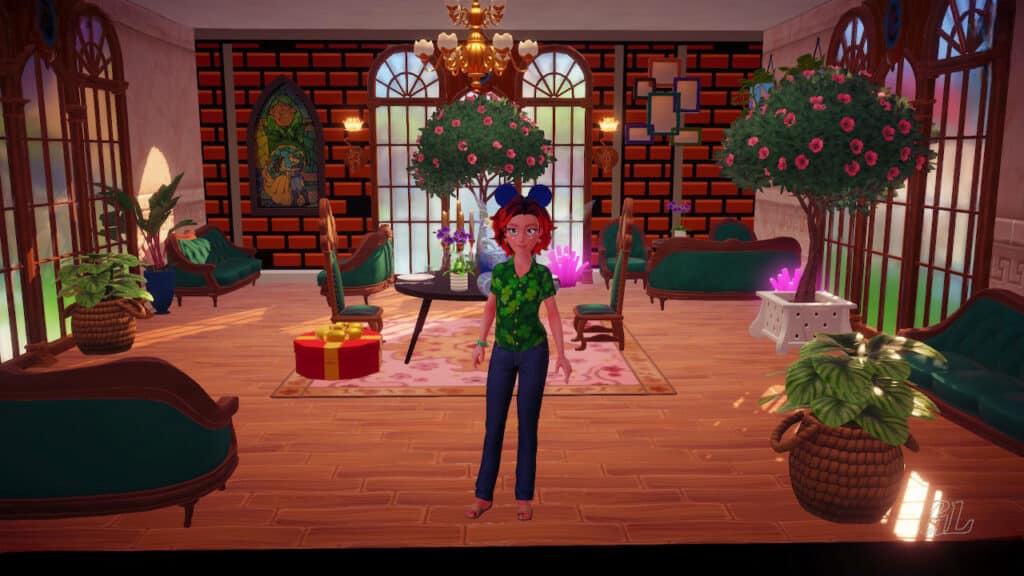
Image Credit: IzziBGran / GamifiedLife, LLC
More Disney Dreamlight Valley
Check out more of our Disney Dreamlight Valley Tips: 15 Early Game Tips for Disney Dreamlight Valley.
In This Article
Disney Dreamlight Valley Guides
- Storybook Vale Critters Guide
- Navigating Storybook Vale
- Goofy's Storybook Vale Stalls
- All Storybook Vale Recipes
- All Blocked Chests in SV Trials
- Wild Woods Fairy Tale Trial
- Teapot Falls Fairy Tale Trial
- Fallen Fortress Fairy Tale Trial
- Elysian Fields Mythic Trial
- Fiery Plains Mythic Trial
- Statue's Shadow Mythic Trial
- Maleficent's Castle
- Mount Olympus
-
- Ariel
- Beast
- Belle
- Daisy
- Donald
- EVE
- Fairy Godmother
- Gaston
- Goofy
- Jack Skellington
- Jafar
- Kristoff
- Maui
- Merlin
- Mickey Mouse
- Mike Wazowski
- Minnie Mouse
- Mirabel
- Moana
- Mother Gothel
- Mulan
- Mushu
- Olaf
- Oswald
- Prince Eric
- Pumbaa
- Rapunzel
- Remy
- Scar
- Scrooge McDuck
- Simba
- Stitch
- Sulley
- The Forgotten
- Tiana
- Timon
- Ursula & Vanessa
- Vanellope
- WALL-E
About the Author: IzziBGran
Get the latest news & updates
